Metal roofing offers exceptional durability, longevity, and weather resistance, but only when installed correctly. One of the most critical aspects of metal roof installation is proper panel overlap. Even premium metal roofing materials will fail prematurely if overlaps are executed incorrectly, leading to water intrusion, wind damage, and costly repairs.
Understanding how to overlap metal roofing panels correctly ensures your roof provides decades of reliable protection. This comprehensive guide covers everything from overlap fundamentals and measurements to troubleshooting leaks and repair techniques. Whether you’re a homeowner planning a DIY project or researching what to expect from professional installation, this guide will help you understand the critical role overlap plays in metal roof performance.
Understanding Metal Roofing Overlap Fundamentals

What is Metal Roofing Overlap and Why It Matters
Metal roofing overlap refers to the way adjacent panels connect to create a continuous, weathertight barrier. There are two types of overlap: side lap (horizontal overlap between adjacent panels) and end lap (vertical overlap where panel lengths meet). Proper overlap ensures water flows off the roof surface without penetrating joints, prevents wind from lifting panels, and accommodates thermal expansion and contraction of metal materials.
Unlike asphalt shingles that rely on overlapping layers and adhesive strips, metal panels depend on precise mechanical connections and sealants. The overlap creates a shingling effect where water naturally flows down and off the roof. When executed incorrectly, overlaps become the weakest point in the roofing system, allowing water to travel sideways or even upward through capillary action.
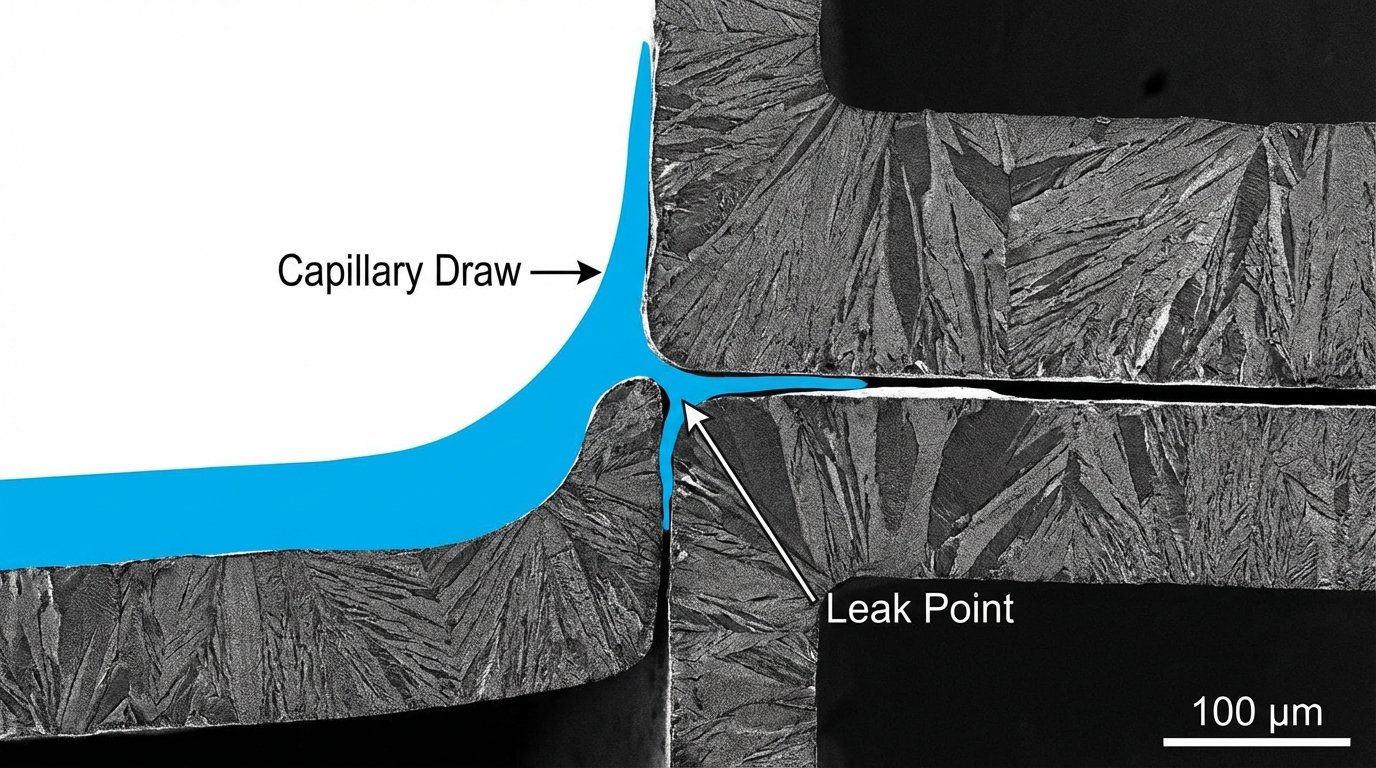
The Science of Capillary Action: Why Overlaps Leak
Capillary action is the primary culprit behind metal roof overlap leaks. This phenomenon occurs when water is drawn upward between two closely spaced surfaces due to surface tension and adhesive forces. In metal roofing, even tiny gaps at overlaps can allow water to defy gravity and travel upward, eventually finding its way beneath the panels and into the roof deck.
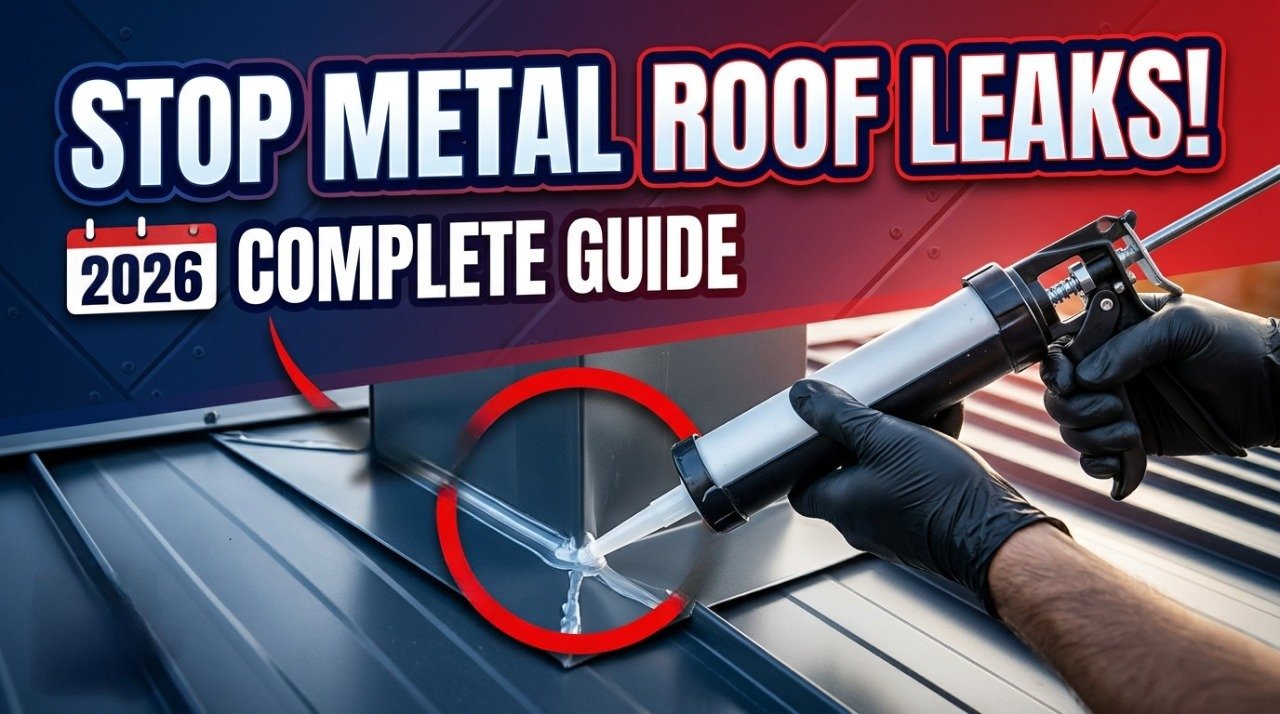
This is why sealant is absolutely critical at overlap joints. Without proper sealant, wind-driven rain can be forced into the narrow space between overlapping panels. Once water enters this gap, capillary action pulls it upward and inward, bypassing the roof’s water-shedding design. Adequate overlap distance combined with continuous sealant application prevents capillary draw by eliminating the pathway water needs to travel.
Types of Metal Roofing and Their Specific Overlap Requirements
Standing Seam Metal Roofing Overlap Techniques
Standing seam metal roofing features raised seams that connect adjacent panels through a snap-lock or mechanical seaming process. Side laps on standing seam systems typically involve overlapping the male and female edges of adjacent panels, which are then crimped together using a seaming tool. This creates a continuous, raised seam that sheds water effectively while allowing for thermal movement.
End laps on standing seam roofs require special attention. When panels don’t span the full roof length, end laps should overlap by at least 6 inches on roofs with a 3:12 pitch or greater. For lower pitches, 8 to 12 inches of overlap is recommended. Always position end laps over solid structural support and apply butyl sealant tape between panels before fastening.
Corrugated and Exposed Fastener Panel Overlap Standards
Corrugated metal panels and exposed fastener systems like R-panels or PBR panels require side lap overlap of at least one full corrugation or rib. Most manufacturers recommend overlapping by one and a half ribs for enhanced weather protection, especially in high-wind or heavy-rain regions. The side lap must be sealed with butyl tape and secured with fasteners spaced every 12 to 18 inches along the overlap.
End laps for corrugated panels follow similar guidelines as standing seam: minimum 6 inches on standard pitch roofs, extending to 8-12 inches for low-slope applications. The upper panel always overlaps the lower panel, creating a shingling effect that directs water downward. Fasteners should be installed every 6 inches around the perimeter of end lap joints to prevent wind uplift and ensure the sealant remains compressed.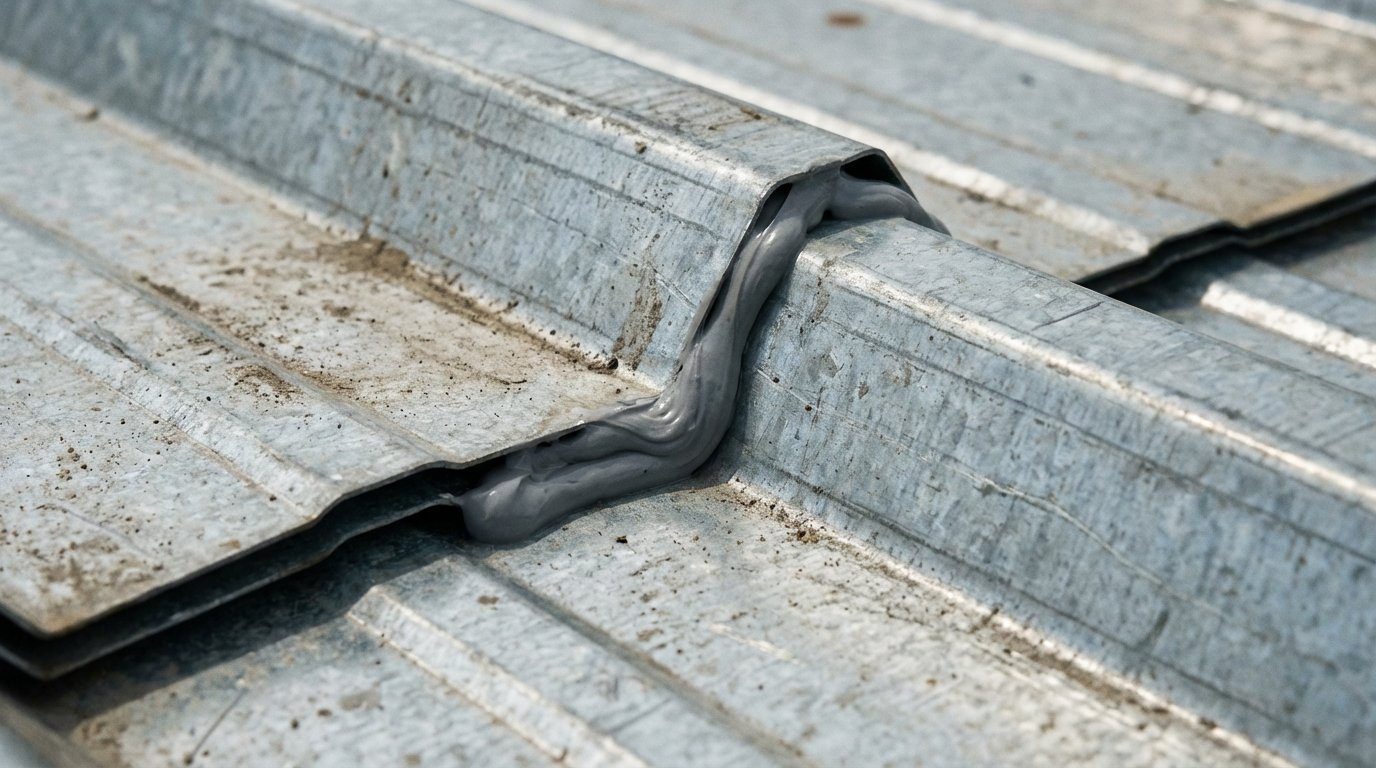
Overlap Measurements by Roof Pitch and Climate
Low-Slope Roofs: Enhanced Overlap Requirements
Low-slope roofs with pitches between 2:12 and 3:12 require extended overlap distances because water drains more slowly and can pool at joints. End laps should be 8 to 12 inches minimum, and some manufacturers require up to 12 inches for pitches at or near 2:12. Side laps should overlap by at least one and a half ribs on corrugated systems, with continuous butyl tape sealant mandatory.
Low-slope installations also benefit from double-sided butyl tape application and additional fastener density. Consider using ice-and-water shield underlayment in all overlap areas to provide a secondary water barrier. These extra precautions compensate for the reduced gravitational drainage on low-pitch roofs. If you have a flat or low-slope roof, consult a professional to determine the best overlap and waterproofing strategy for your specific system.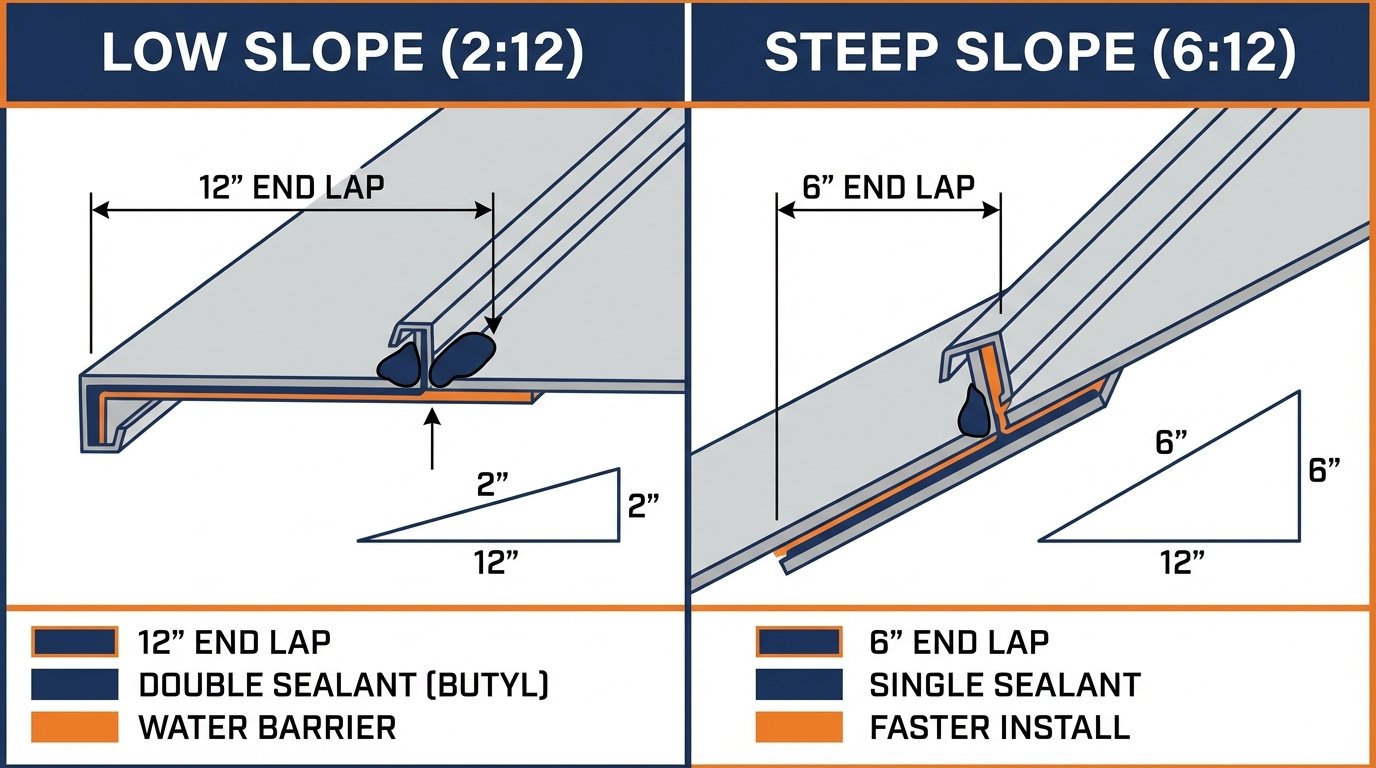
Medium to Steep-Slope Roofs: Standard Overlap Specifications
Roofs with pitches of 4:12 and higher can use standard overlap measurements: 6 to 8 inches for end laps and one full rib for side laps on corrugated panels. Steeper pitches allow water to shed more efficiently, reducing the risk of wind-driven rain penetration. However, sealant remains essential regardless of pitch—never skip the butyl tape application between overlapping panels.
High-Wind and Hurricane-Prone Areas
Coastal regions and hurricane zones require enhanced overlap specifications to meet building code wind uplift ratings. Fastener spacing is typically reduced to every 12 inches or less at overlaps, and some jurisdictions require structural sealants in addition to standard butyl tape. End laps may need to be extended to 10 or 12 inches, and panels should be oriented so overlaps face away from prevailing wind directions to prevent wind-driven rain infiltration. A professional roofing inspection can help verify that your installation meets local wind uplift requirements.
Side Lap vs. End Lap: Understanding the Difference
What is Side Lap
Side lap refers to the horizontal overlap where adjacent panels meet side-by-side across the roof. On corrugated and R-panel systems, this means one panel’s rib overlaps the neighboring panel’s rib by at least one full corrugation. On standing seam systems, the male and female edges of adjacent panels interlock to create the side lap connection. Side laps run from eave to ridge and must be sealed continuously with butyl tape to prevent lateral water migration.
What is End Lap
End lap occurs when panel lengths are insufficient to cover the full roof slope, requiring vertical splicing of panels. The upper panel always overlaps the lower panel, creating a shingling effect. End laps are more vulnerable to leaks than side laps because water flows directly over these joints. Proper end lap installation requires positioning the joint over structural support, applying continuous sealant, and using dense fastener spacing around the entire perimeter of the overlap area.
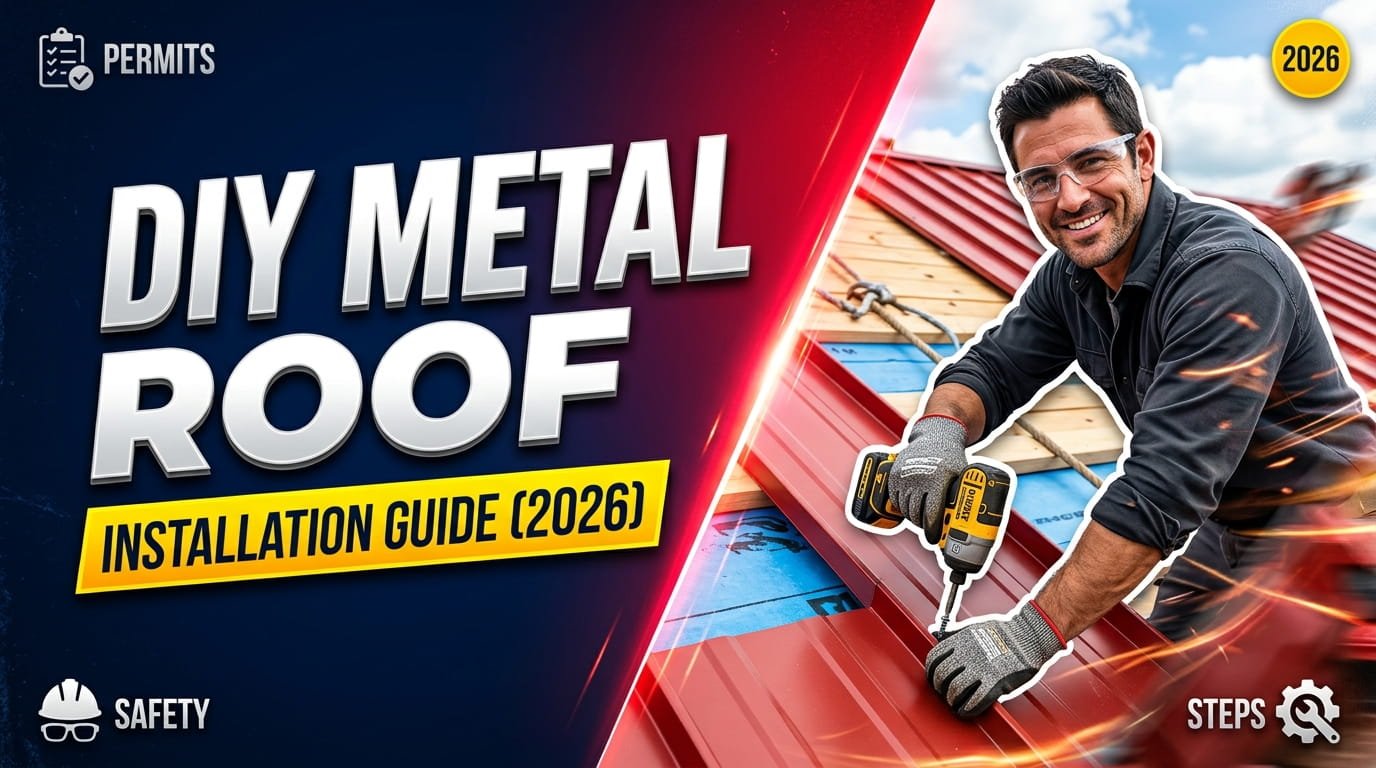
Step-by-Step Installation Process for Proper Overlap
Roof Deck Preparation and Underlayment
Before installing any panels, inspect the roof deck thoroughly for damage, rot, or unevenness. Repair or replace compromised decking to ensure a solid foundation. Install high-quality underlayment—synthetic underlayment is preferred for its strength and water resistance. In areas prone to ice dams or extreme weather, use ice-and-water shield along eaves, valleys, and around all penetrations.
Snap a chalk line along the eave to ensure the first panel installs perfectly square. A misaligned first panel compounds alignment problems across the entire roof, making proper overlap nearly impossible to achieve.
First Panel Placement and Wind Direction
Start installation at the gable end opposite the prevailing wind direction. This ensures wind-driven rain hits the smooth side of overlaps rather than forcing water into seams. Position the first panel aligned with your chalk line, extending three-quarters to one inch beyond the eave to direct water into seamless gutters. Secure with fasteners every 12 to 18 inches along the eave, being careful not to over-tighten and deform the panel or crush the neoprene washers.
Applying Butyl Tape and Installing Adjacent Panels
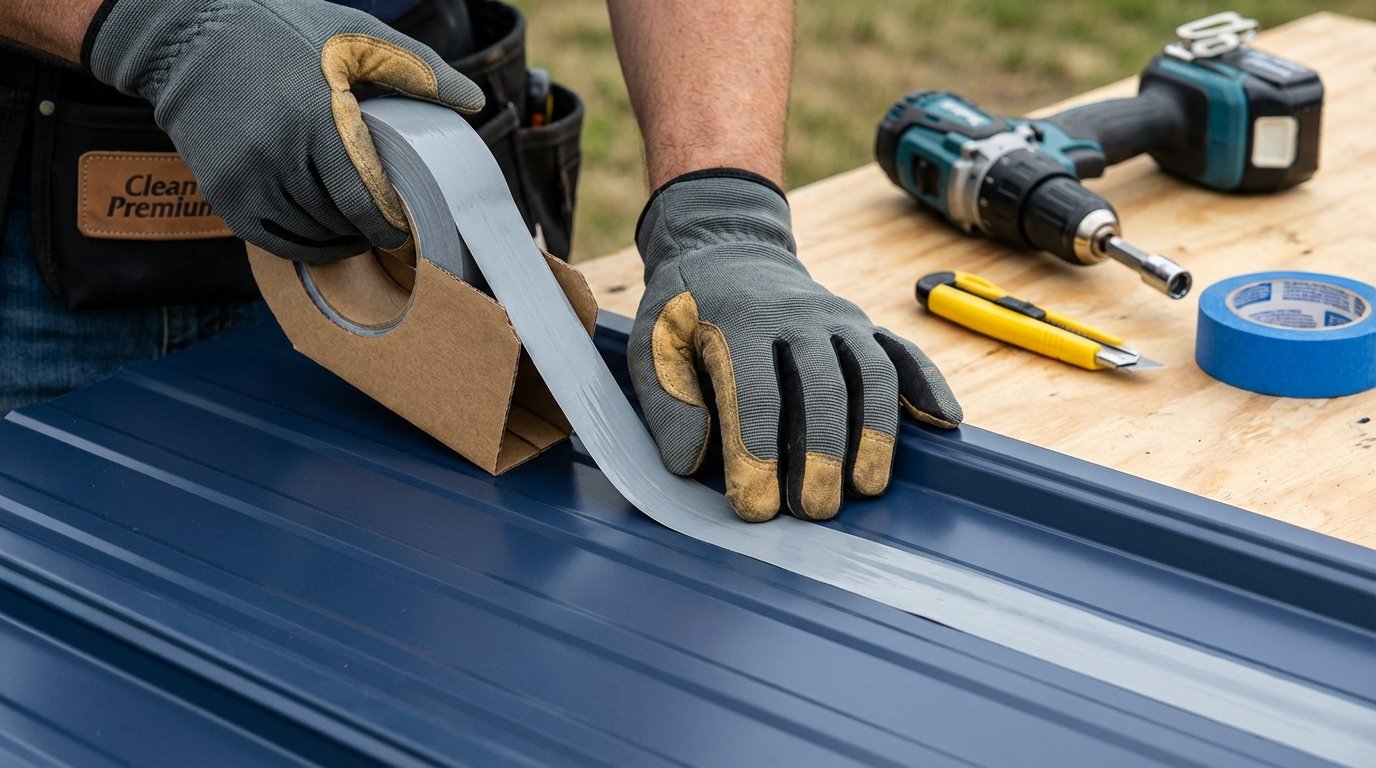
Before positioning the second panel, apply a continuous strip of butyl sealant tape along the overlap area of the first panel. Butyl tape is the industry standard because it remains flexible through temperature extremes and provides excellent adhesion to metal surfaces. Position the second panel so it overlaps by the required distance—typically one full rib for corrugated systems. Press firmly to seat the butyl tape, then secure with fasteners.
For standing seam systems, engage the snap-lock mechanism using the appropriate seaming tool. Ensure the seam is fully crimped along its entire length with no gaps. Continue this process across the roof, maintaining consistent overlap and alignment.
End Lap Installation Over Structural Supports
When panels don’t cover the full roof length, end laps must be positioned over solid structural support such as purlins or roof trusses. Never allow end laps to span between supports, as this creates weak points vulnerable to deflection and leaks. Apply butyl tape to the lower panel, overlap the upper panel by the specified distance (6-12 inches depending on pitch), and secure with fasteners spaced every 6 inches around the perimeter. This dense fastener pattern prevents capillary action and wind penetration.
Metal Roof Leaking at Overlap: Diagnosis and Troubleshooting
Common Signs of Overlap Leaks
Overlap leaks manifest in several ways. Interior water stains on ceilings or walls, particularly in lines or patterns that follow panel seams, indicate water penetrating at overlaps. In attics, look for damp insulation, water trails on the underside of metal panels, or moisture accumulation along panel seams. Active leaks during rain may appear as drips from specific points along panel joints.
Seasonal patterns also provide clues. Leaks that occur only during heavy wind-driven rain suggest inadequate overlap or missing sealant allowing wind to force water into seams. Winter leaks in cold climates often indicate ice dam formation at end laps, where water backs up beneath the metal panels. Leaks that appear after hot weather may result from sealant failure due to thermal stress. Understanding metal roof insulation can also help prevent condensation-related moisture issues that are sometimes mistaken for overlap leaks.
How to Locate the Exact Source of Overlap Leaks
Finding the precise leak source requires systematic investigation. Start in the attic during or immediately after rainfall. Using a flashlight, trace water trails backward from drip points to their origin. Water often travels along panel seams before dripping, so the visible leak may be several feet from the actual penetration point.
On the roof surface, inspect all overlap areas for gaps, missing sealant, damaged fasteners, or visible daylight between panels. Pay special attention to end laps, as these are most vulnerable. Check that overlaps are oriented correctly—the upper panel should always overlap the lower panel to create proper water flow. Look for rust stains, as these often indicate water entry points.
Causes of Metal Roof Overlap Leaks
The most common cause of overlap leaks is insufficient overlap distance. When panels overlap by less than the manufacturer’s specification, capillary action can draw water upward between the panels. Missing or degraded sealant is equally problematic, without continuous butyl tape, wind-driven rain easily penetrates joints.
Fastener problems also cause leaks. Over-driven screws crush neoprene washers, creating gaps that allow water entry. Under-driven screws fail to compress washers adequately, leaving the seal incomplete. Fasteners placed incorrectly, outside the overlap area or missing the structural support beneath, cannot hold panels securely, allowing gaps to open.
Thermal expansion and contraction stress overlap joints over time. As metal panels expand in heat and contract in cold, sealants can separate from panel surfaces if they lack adequate flexibility. This is why butyl tape is preferred over rigid caulks, butyl maintains adhesion through temperature cycling. Proper metal roof ventilation also plays a key role in reducing the thermal extremes that accelerate sealant degradation.
How to Repair Leaking Metal Roof Overlaps
Safety First: When to Stay Off the Roof
Roof work is inherently dangerous, especially on steep pitches or during adverse weather. Never attempt repairs during rain, snow, high winds, or extreme heat when metal surfaces become dangerously slippery or hot. Use proper fall protection equipment including harnesses, roof anchors, and non-slip footwear. If you’re uncomfortable working at heights or the roof pitch exceeds your skill level, hire professional roofers who have the training, equipment, and insurance to work safely.
Cleaning and Preparing the Overlap Area
Before attempting repairs, thoroughly clean the overlap area. Remove all dirt, debris, old sealant, and rust using a wire brush and appropriate cleaners. Metal surfaces must be completely dry before applying new sealant—moisture trapped beneath sealant prevents proper adhesion. For best results, clean with a metal roof cleaner or degreaser, rinse thoroughly, and allow to dry completely, preferably for 24 hours in dry weather.
Re-Sealing Overlap Joints with Fresh Butyl Tape
If the overlap distance is adequate but sealant has failed, re-sealing may solve the leak. Carefully separate the overlapping panels if possible without damaging them. Apply a continuous strip of fresh butyl sealant tape along the entire overlap area, ensuring complete coverage with no gaps. Firmly press the panels back together, compressing the butyl tape to create an airtight seal. Secure with fasteners if the original fastening pattern was inadequate.
For overlaps that cannot be separated without panel damage, apply a bead of high-quality polyurethane or silicone sealant along the exterior of the overlap seam. While this provides temporary protection, it’s not as effective as butyl tape applied between panels and should be considered a stopgap measure until proper re-installation can be performed. For persistent or widespread leaks, consider scheduling a professional roofing repair to assess the full extent of the damage.
When to Remove and Reinstall Panels
If overlap distance is insufficient or panels are severely damaged, complete removal and reinstallation is necessary. This is particularly true for end laps positioned incorrectly over unsupported areas. Removing and reinstalling panels allows you to correct fundamental installation errors, apply proper underlayment if missing, and ensure adequate overlap distances. While more labor-intensive than spot repairs, proper reinstallation provides long-term leak protection and prevents recurring problems. In cases of significant damage or widespread installation errors, a full roof replacement may be the most cost-effective long-term solution.
Tools, Materials, and Equipment for Perfect Overlaps
Essential Tools for Metal Roof Installation
Successful metal roof overlap requires specific tools. You’ll need aviation snips or nibblers for cutting panels, a quality tape measure and chalk line for layout, a power drill with a magnetic nut driver for fastener installation, and a seaming tool for standing seam systems. A pry bar helps when separating overlapping panels for repairs. Don’t forget safety equipment: fall protection harness with roof anchors, non-slip boots, heavy-duty work gloves, and safety glasses.
Sealant Selection: Butyl Tape vs. Other Options
Butyl sealant tape is the gold standard for metal roof overlaps. This rubber-based adhesive tape remains flexible through extreme temperature cycling, from sub-zero winters to blazing summer heat. It adheres tenaciously to metal surfaces and maintains its seal for decades. Apply butyl tape in continuous strips along all overlap areas—never leave gaps.
Polyurethane sealants work well for exposed applications like capping ridge seams or sealing fastener heads. Avoid standard silicone sealants for structural overlap sealing—they don’t bond well to metal and can fail prematurely. High-solids sealants specifically formulated for metal roofing provide better long-term performance than economy products. For guidance on compatible products, the Metal Construction Association publishes technical resources on approved sealants and installation standards for metal roofing systems.
Fastener Specifications for Overlap Areas
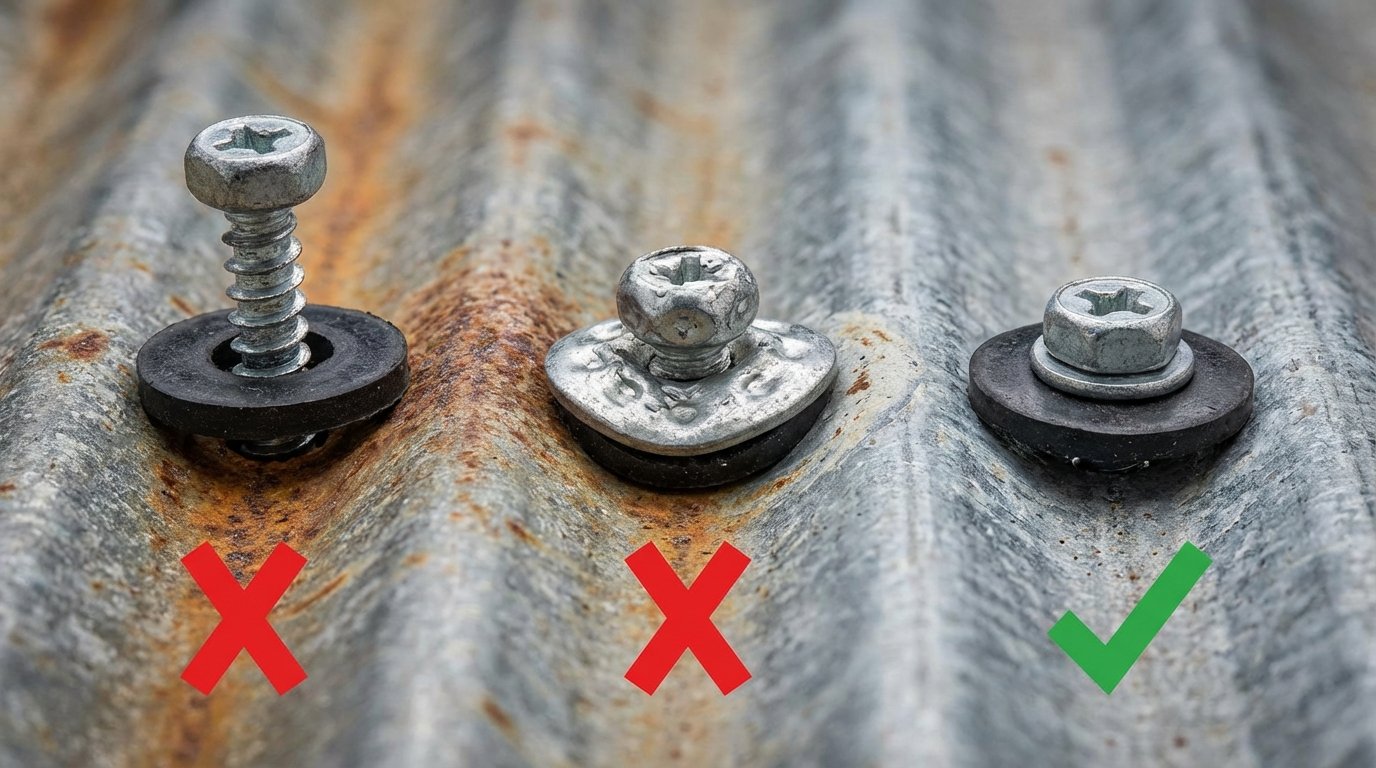
Use self-tapping metal roofing screws with EPDM or neoprene washers specifically designed for the application. Screws should be long enough to penetrate the roof deck by at least three-quarters of an inch, ensuring secure attachment. Color-matched screw heads maintain aesthetic appearance. At overlaps, space fasteners every 12 to 18 inches for side laps and every 6 inches around end lap perimeters. Proper torque is critical—tighten until the washer just begins to compress without crushing it or deforming the panel.
Conclusion: Mastering Metal Roof Overlap for Long-Term Performance
Proper metal roofing overlap is the foundation of a leak-free, durable roof system. Understanding the difference between side laps and end laps, knowing the correct overlap measurements for your roof pitch and climate, and using quality sealants and fasteners ensures your metal roof performs optimally for decades.
When overlap leaks occur, systematic diagnosis helps identify whether the problem stems from insufficient overlap distance, failed sealant, improper fastening, or installation errors. Many overlap issues can be repaired with careful cleaning, re-sealing, and fastener replacement, though severe problems may require panel removal and reinstallation.
Whether you choose DIY installation or hire professionals, insist on proper overlap techniques that follow manufacturer specifications and building codes. The small additional cost and effort required for correct overlap installation pales in comparison to the expense of repairing water damage, replacing damaged materials, or re-roofing prematurely. A properly overlapped metal roof provides reliable protection, energy efficiency, and peace of mind for 40 to 70 years—making it one of the best investments you can make in your home. To explore your options or get expert advice, contact our team or learn more about our residential roofing services. For further reference on industry installation standards, the National Roofing Contractors Association (NRCA) provides authoritative guidelines on metal roof installation best practices.