Key Takeaways
- Metal roofs can leak, but most leaks happen at seams, fasteners, flashing, and penetrations rather than through the metal panels themselves.
- The most common causes of metal roof leaks include damaged flashing, loose fasteners, failed sealant, rust, poor installation, physical damage, ice dams, and gutter backup.
- The best way to find a leak is to start inside the attic, inspect the roof from the ground, check high risk areas on the roof, and use a garden hose test if needed.
- Small repairs like re-caulking, tightening fasteners, and patching minor holes can often be handled by a careful homeowner with the right tools and safety steps.
- Bigger problems like failing flashing, panel replacement, repeated leaks, or structural damage should be handled by a professional roofing contractor.
- Seasonal maintenance such as clearing debris, checking sealant, inspecting gutters, and watching for rust can help prevent leaks and extend the life of a metal roof.
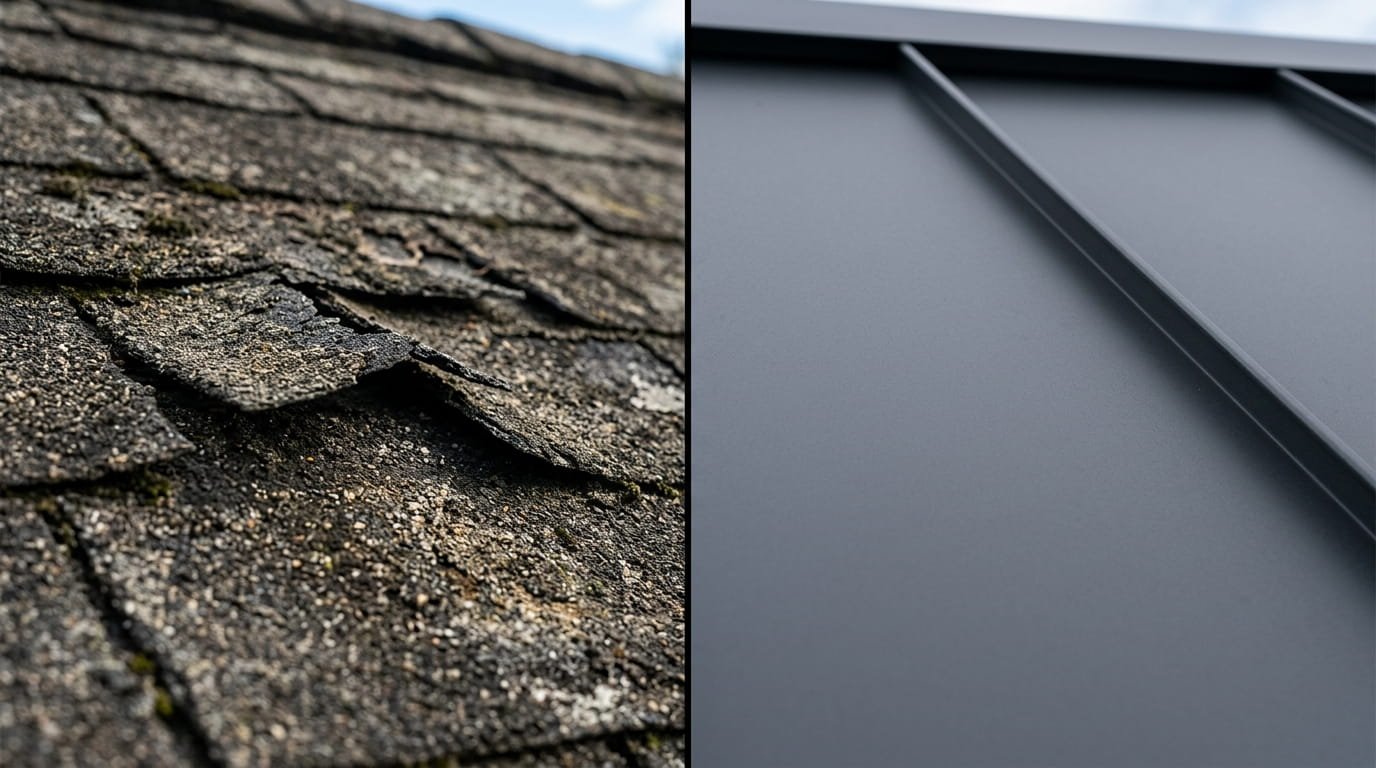
Do metal roofs leak? Yes, they can. But here is the good news: they are far less prone to leaks than traditional asphalt shingles, and most leaks are completely fixable if you catch them early. Metal roofs are engineered to last anywhere from 40 to 70 years, compared to just 15 to 25 years for asphalt shingles. Yet even the toughest roofing systems are not immune to wear, improper installation, or the relentless forces of nature.
According to the Metal Roofing Alliance, metal roofs dramatically outperform other roofing materials in longevity and weather resistance. That said, knowing how to find a leak in a metal roof before it becomes a costly problem is something every property owner should understand. In this guide, we will walk you through exactly how to locate a leak, repair it yourself when possible, and know when it is time to call in a professional.
Do Metal Roofs Leak? Understanding What Really Goes Wrong
Leaks in metal roofs originate almost exclusively at connection points: seams where panels meet, fasteners driven into the roof, and penetration points like chimneys, vents, and skylights.
Here is a quick comparison to put things in perspective:
| Feature | Metal Roof | Asphalt Shingles |
| Lifespan | 40 to 70 years | 15 to 25 years |
| Leak Frequency | Lower | Higher |
| Where Leaks Occur | Seams, joints, penetrations | Surface cracks, edges |
| DIY Fixable? | Often yes | Often yes |
The biggest misconception homeowners have is that metal equals waterproof. It does not. What it means is that the metal panel itself will rarely be the source of your problem. The weak points are always in the details, and that is exactly where you need to focus your inspection efforts.
What Causes Leaks in a Metal Roof? 8 Culprits to Know
Before you can fix a leak, you need to understand what caused it. Metal roof leaks have a surprisingly short list of common origins, and most of them are preventable. Here are the eight most frequent causes homeowners and contractors encounter.
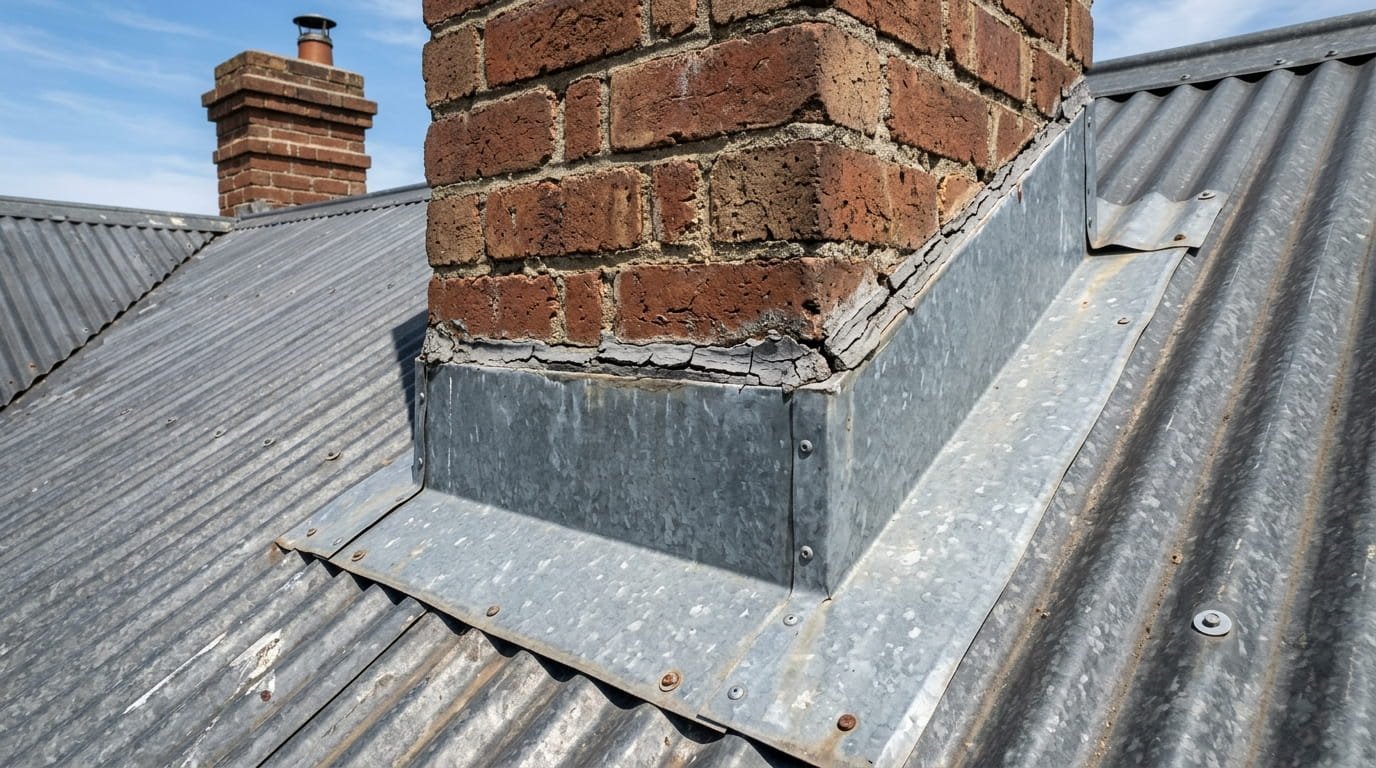
1. Damaged or Corroded Flashing
Flashing is the thin metal material installed around transitions like chimneys, vents, and skylights. When it cracks, rusts, or pulls away from the surface, water has a direct path into your home. Flashing failure is one of the leading causes of metal roof leaks.
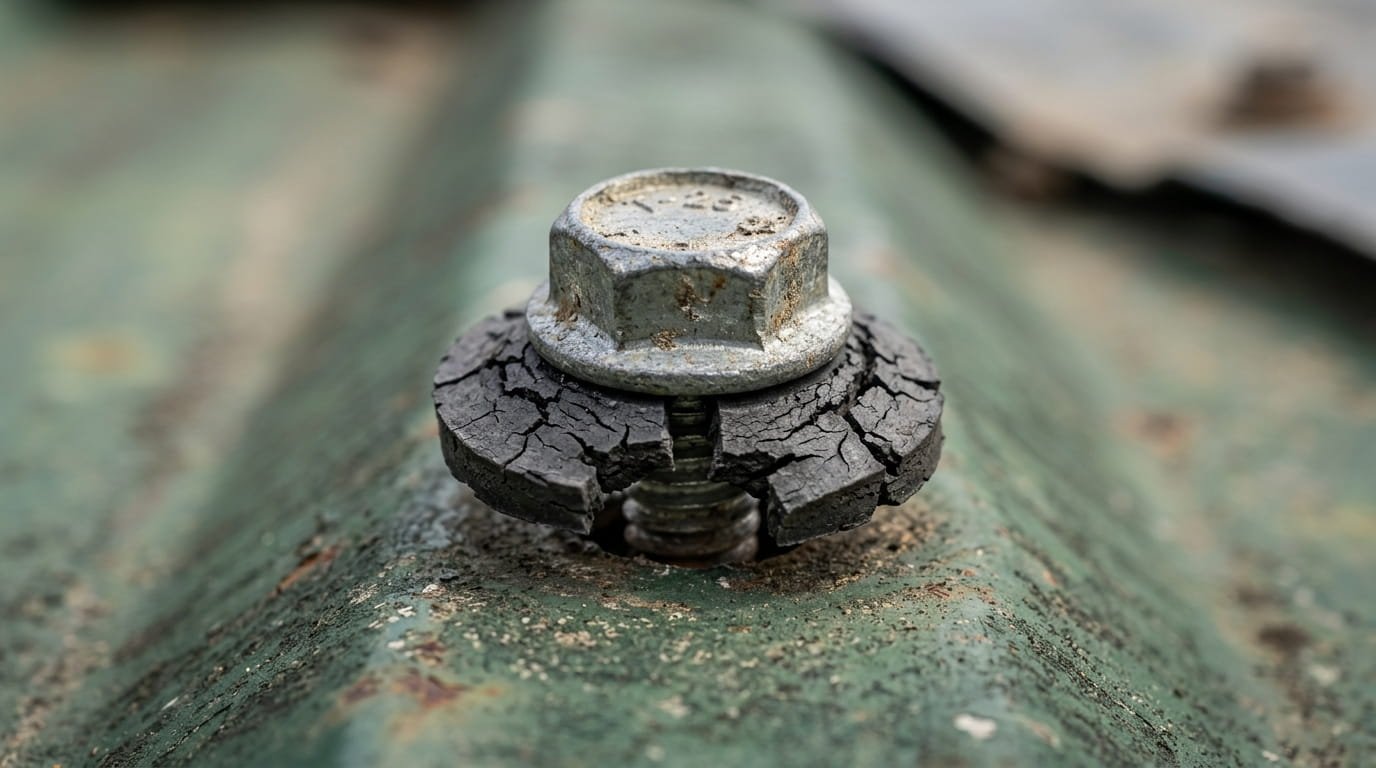
2. Loose or Missing Fasteners
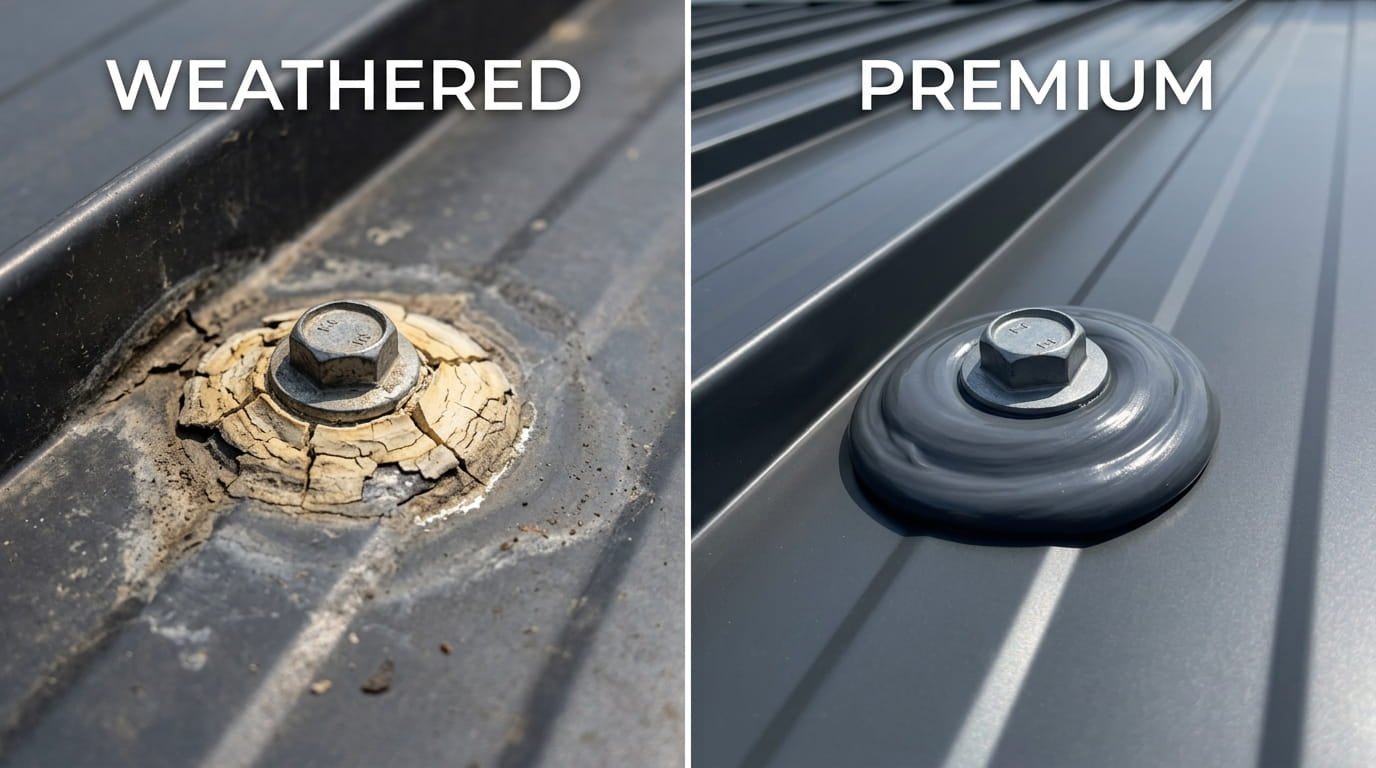
Screws and bolts hold your panels in place, but they are also a vulnerability. Over time, thermal expansion and contraction can cause fasteners to back out of the roof. What most guides miss is the opposite problem: over-tightened fasteners can crush the rubber washer beneath them, destroying the watertight seal. Both loose and over-tightened screws create leak pathways.
3. Failed Sealant and Caulk
Even the best sealant has a lifespan. UV exposure, temperature swings, and general aging cause caulk to crack, shrink, and pull away from surfaces. Any gap in sealant around a penetration is an open invitation for water.
4. Rust and Corrosion at Seams
While metal roofs resist corrosion far better than older materials, certain environments, especially coastal or industrial areas, can accelerate rust formation. Seams that collect standing water are particularly vulnerable to corrosion over time.
5. Improper Installation
Panel overlap issues, incorrect fastener placement, and poor flashing installation during the original job can create leak points that may not show up for years. If your roof was not installed by an experienced crew, improper installation may be at the root of your problems.
6. Physical Damage from Debris or Foot Traffic
Falling branches, hail, or walking on the roof without proper technique can dent or crack panels and compromise protective coatings. Even small dents can create low spots where water pools instead of draining.
7. Ice Dams
This is a cause almost every competitor guide ignores. In colder climates, snow melts at the warm center of the roof and refreezes near the cold eaves, forming ice dams. These dams force water to back up under the panels and eventually find a way inside. Proper insulation and ventilation are the primary defenses against ice dam formation.
8. Gutter Backup Causing Water Infiltration
Clogged or improperly pitched gutters cause water to back up and pool along the roof edge. Over time, that standing water can work its way under panels and into your home. Regular gutter maintenance is a key part of metal roof care. You can learn more about protecting your drainage system through our seamless gutters services.
Tools You Will Need Before You Start

Safety and preparation are everything when it comes to a roof inspection. Before you climb a single rung, make sure you have the right gear on hand. Showing up unprepared wastes time and puts you at risk.
Here is what you should gather before heading up:
- Safety harness and non-slip shoes to protect yourself on sloped surfaces
- Flashlight or headlamp for attic inspections in dark spaces
- Garden hose for the water simulation test described below
- Chalk or marking tape to flag suspected leak zones for later repair
- Binoculars so you can inspect the roof from the ground before going up
- A sturdy ladder that extends well past the roofline
- Your phone or a camera to photograph problem areas for reference
- A moisture meter (optional) to detect hidden dampness in insulation or decking
How to Find a Leak in a Metal Roof: Step-by-Step
Knowing how to find a leak in a metal roof is part detective work, part patience. Water is deceptive. It enters at one point and travels along rafters, insulation, or decking before it ever drips anywhere visible. Follow these steps in order for the most reliable results.
Step 1: Safety First
Never inspect your roof alone, and always check the forecast before heading up. A wet or icy roof is exponentially more dangerous. Wear rubber-soled shoes with good grip, secure your harness to a ridge anchor, and move deliberately. No inspection is worth a fall.
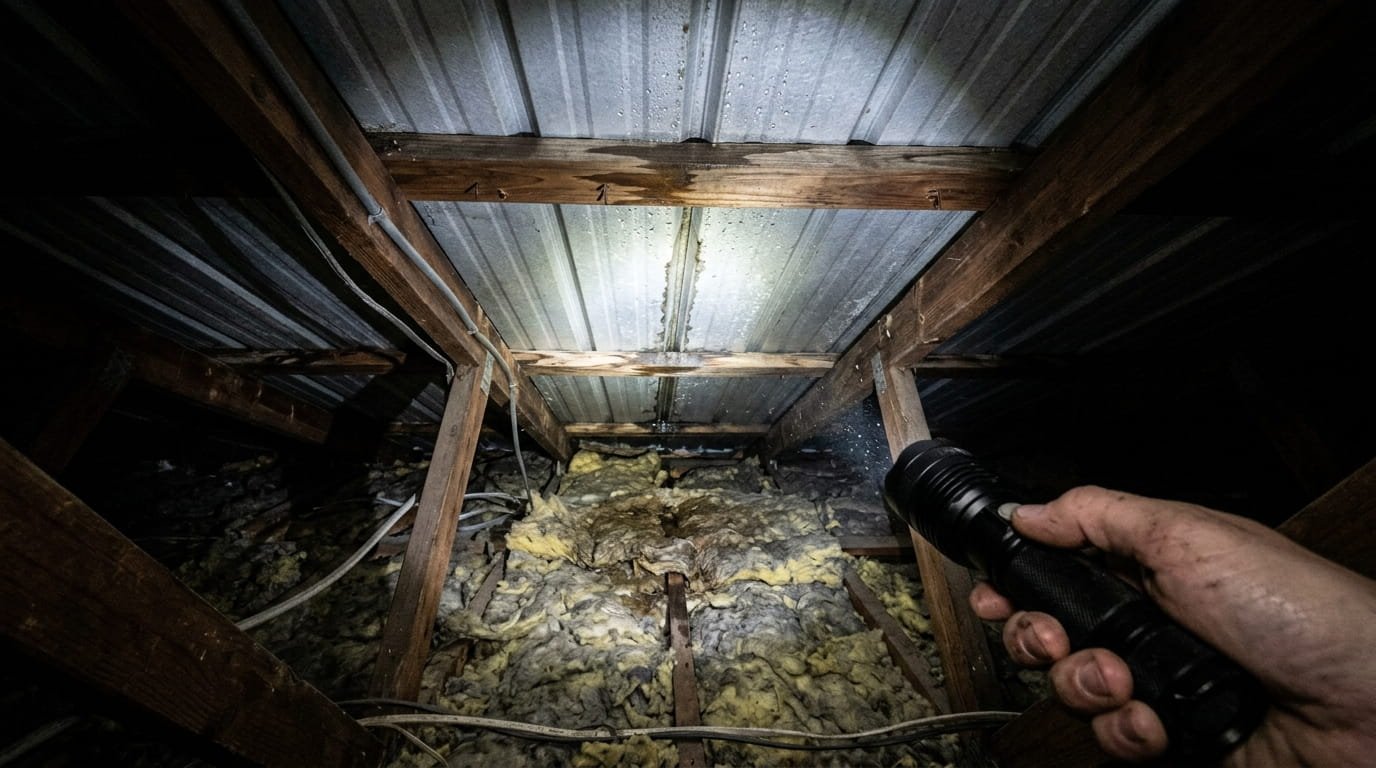
Step 2: Start with an Interior Inspection
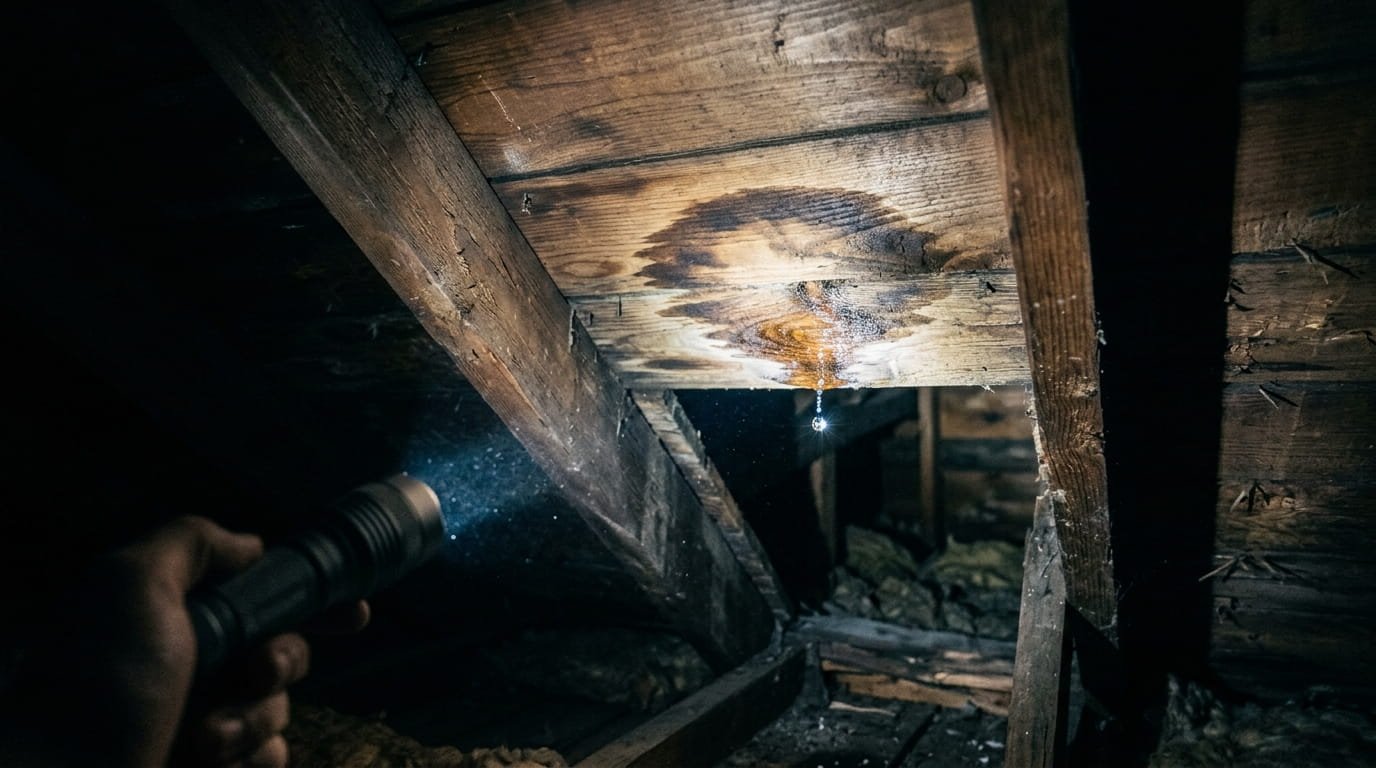
Before stepping outside, go into your attic armed with a flashlight. You are looking for water stains on the decking, damp or matted insulation, and the musty smell of mold or mildew. Pay attention to stain color: fresh water stains appear dark brown or black, while older stains fade to gray or yellowish rings. This distinction can help you determine whether you have an active leak or a repaired one that left a ghost stain.
Step 3: Exterior Ground Inspection
Walk the full perimeter of your home with your binoculars before ever getting on the roof. Look for rust streaks running down the siding below the roofline, bent or buckled panels, missing ridge caps, and any areas where debris has accumulated. Check the gutters for granule buildup or rust-colored water stains, which can indicate deterioration near the roof edge.
Step 4: Inspect the Four High-Risk Zones
Once on the roof, focus your attention on the areas most likely to fail. These four zones account for the vast majority of metal roof leaks:
- Roof penetrations: Chimneys, vent pipes, skylights, and satellite mounts. Check for cracked caulk, lifted flashing, and rust around any point where something passes through the roof surface.
- Panel seams and fasteners: Look for missing neoprene washers, screws that are visibly backing out, and any gap where two panels meet.
- Ridge lines and transitions: Hip and valley sections, dormers, and any transition from one roof angle to another are classic problem spots. Check that ridge caps are seated firmly and that all edges are properly sealed.
- Edges and gutters: Water backup from clogged or slow gutters can infiltrate the roof edge. Look for staining or soft spots near the fascia.
| Zone | Risk Level | What to Look For | How Often |
| Penetrations | Very High | Cracked flashing, rust, loose caulk | Every 6 months |
| Fasteners | High | Loose/missing screws, worn washers | Every 6 months |
| Seams | Medium | Gaps, panel misalignment | Annually |
| Ridge Caps | Medium | Loose caps, wind damage | Annually |
| Gutters | Low | Clogs, improper drainage | Each season |
Step 5: The Garden Hose Test
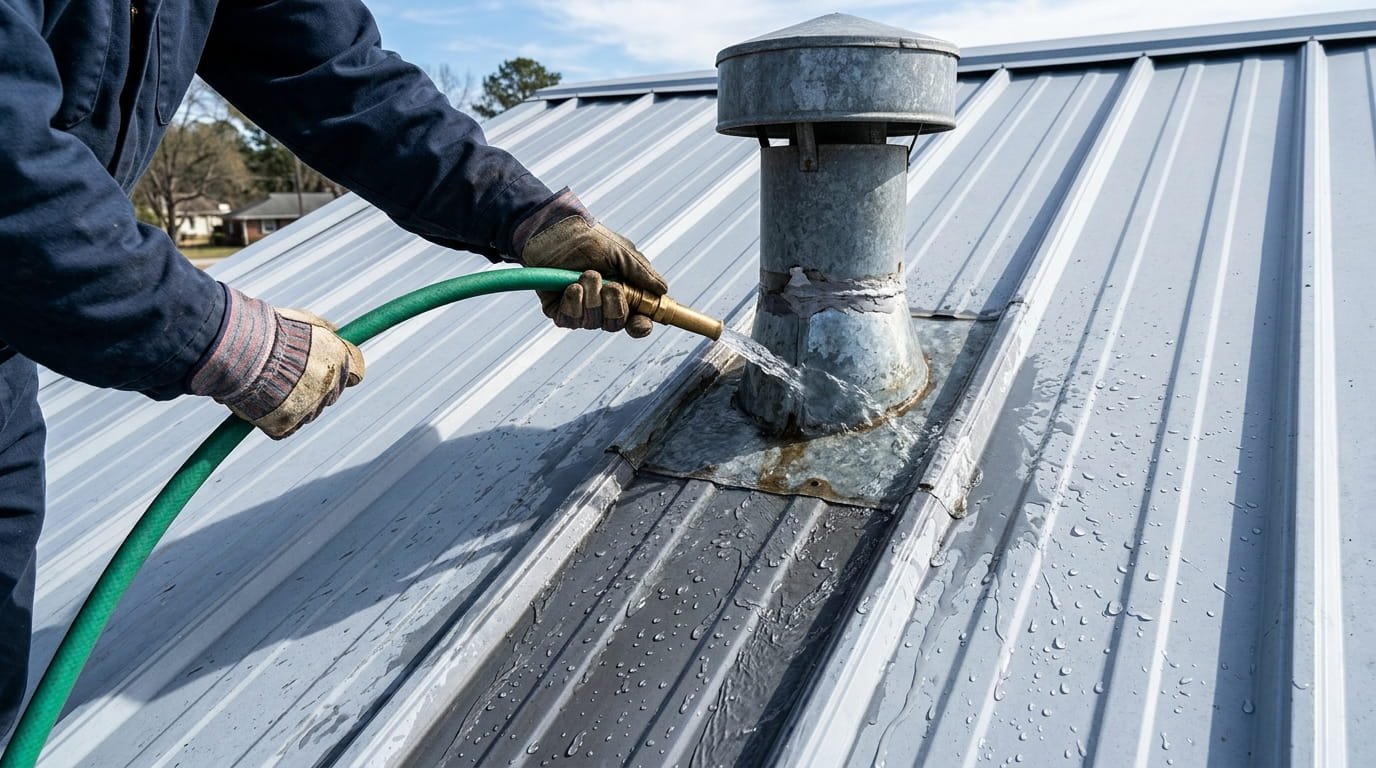
If your interior and exterior inspections have narrowed down the general area of the leak but you cannot pinpoint the exact entry point, the garden hose test is your best friend. Start at the lowest suspected area and work your way up methodically, soaking each zone for three to five minutes before moving higher.
Have a helper stationed in the attic watching for the drip to appear. Use a slow, steady soak rather than a fast spray. A slow soak mimics real rain and is far more accurate at revealing leak paths. Always perform this test after a dry spell so any moisture you spot is definitely from your hose, not from a previous rain event.
How to Fix a Leak in a Metal Roof: 6 DIY Repairs
Once you have found the source, it is time to get to work. Here is a breakdown of the most common repairs, along with an honest difficulty rating for each. Knowing how to fix a leak in a metal roof yourself can save you hundreds of dollars on smaller jobs.
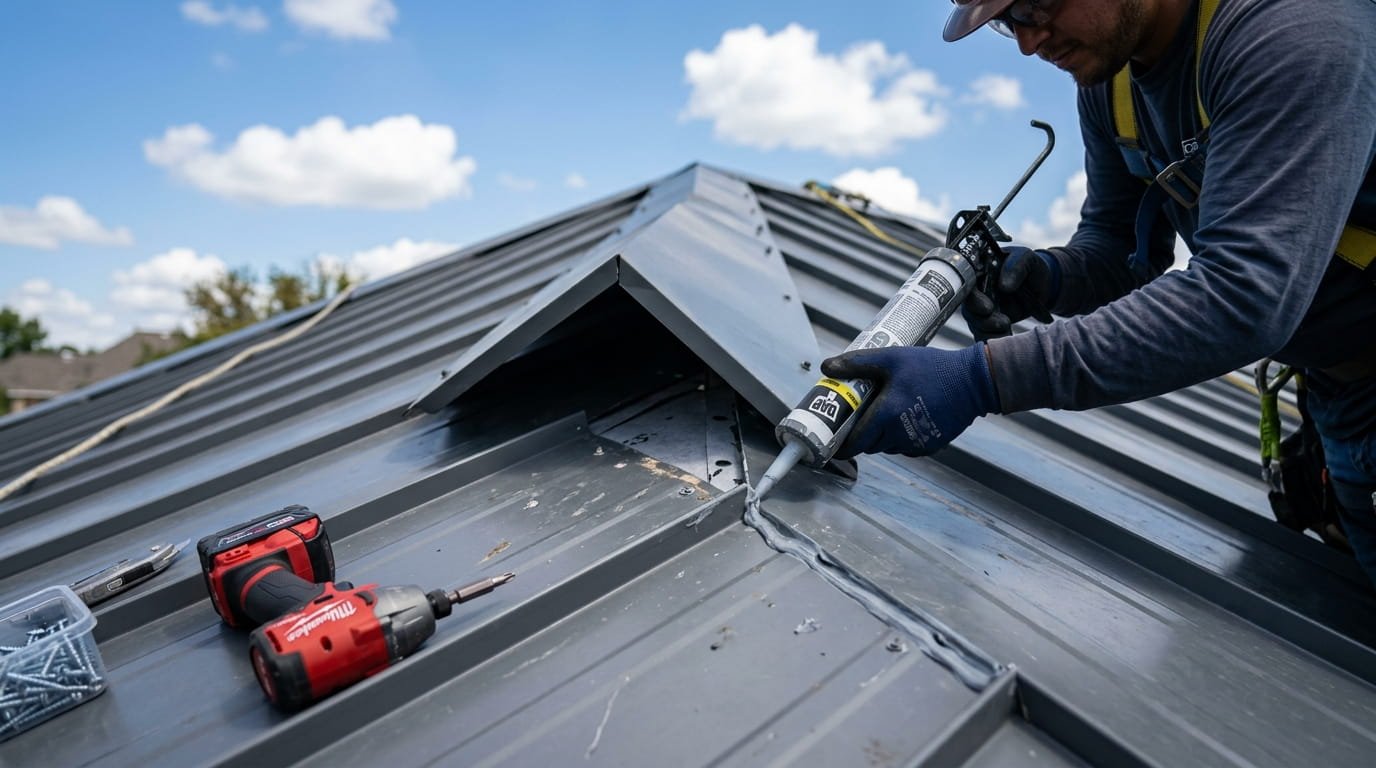
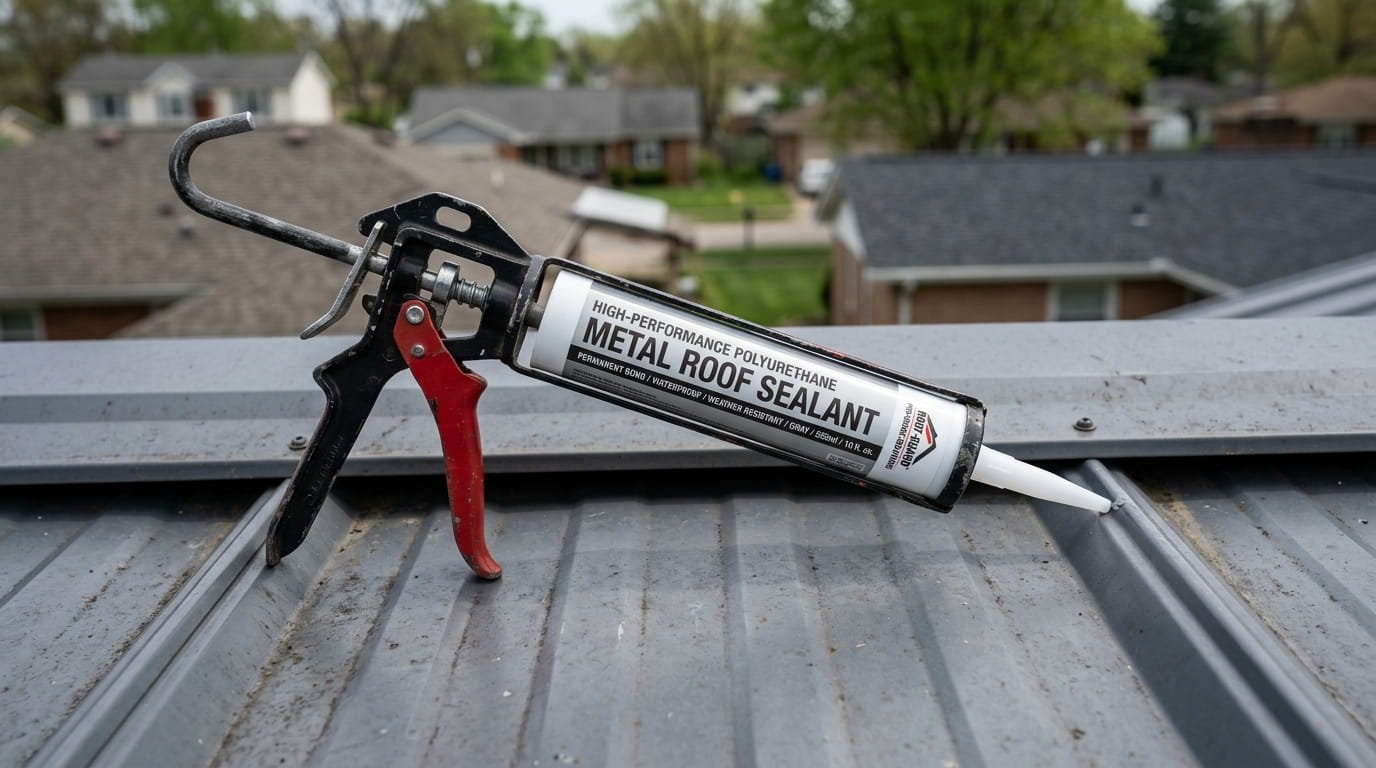
Fix 1: Re-Caulk Around Penetrations (Difficulty: Easy)
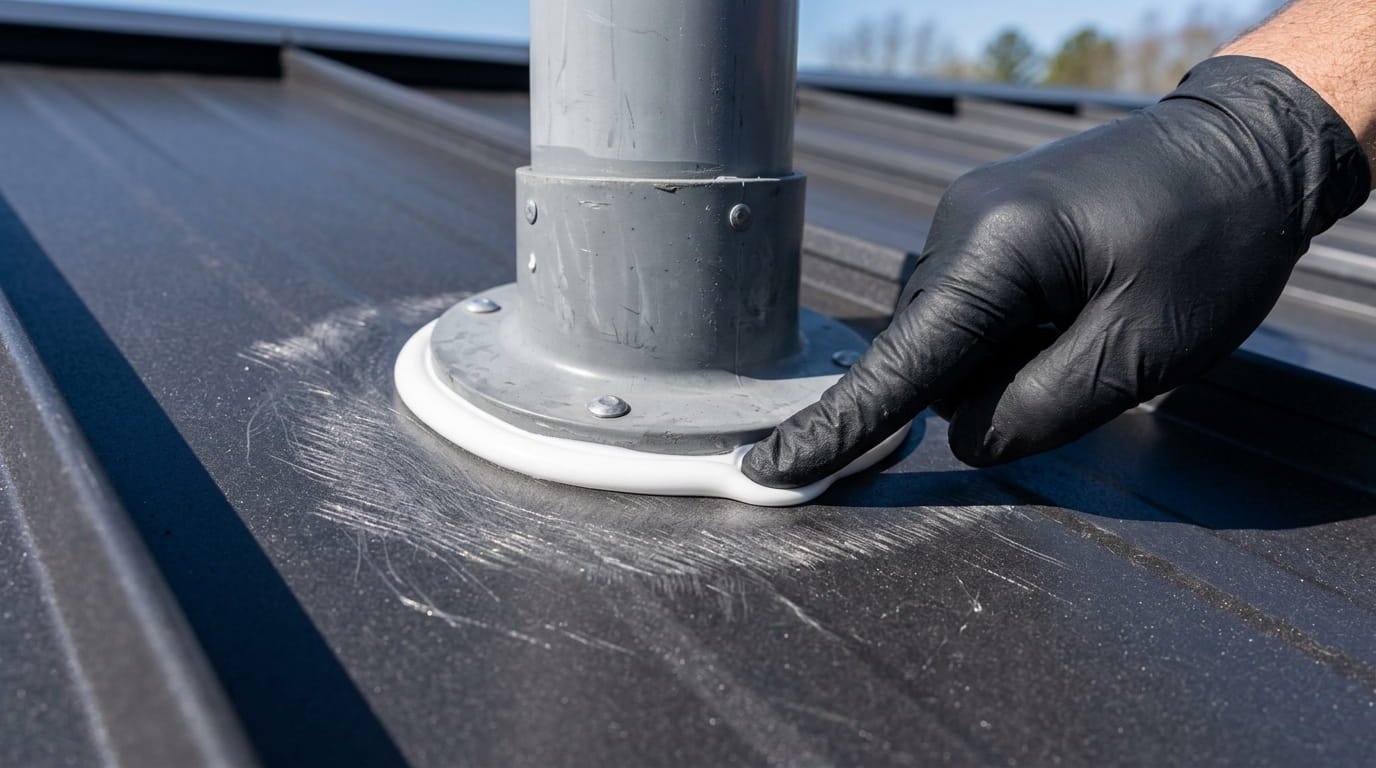
This is the most common and most approachable repair on the list. Use a putty knife to remove all old, cracked sealant from around the penetration. Clean the surface thoroughly with a wire brush and wipe it down with a dry cloth. Apply a fresh bead of polyurethane or silicone sealant rated specifically for metal roofing, then smooth it with a gloved finger to ensure full contact. Do not leave any air gaps.
Fix 2: Tighten or Replace Fasteners (Difficulty: Easy)
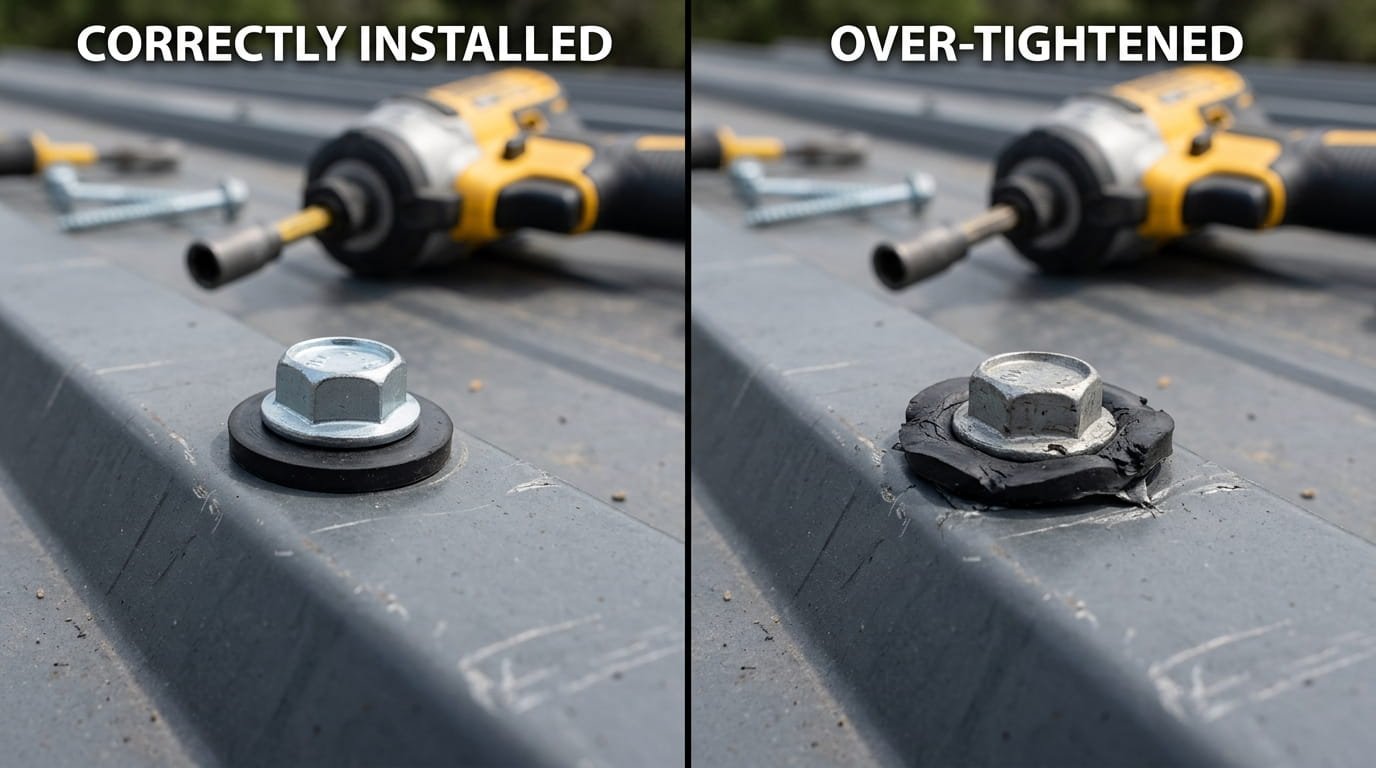
Walk the roof and check every visible screw. Any that spin freely need to be replaced, not just tightened further. When replacing, always use neoprene-washered screws designed for metal roofing. The washer creates the seal, and a worn or missing washer defeats the entire purpose. Do not over-tighten: snug is correct, and compressed to the point of deformation means the seal is already broken.
Fix 3: Patch a Small Hole or Tear (Difficulty: Moderate)
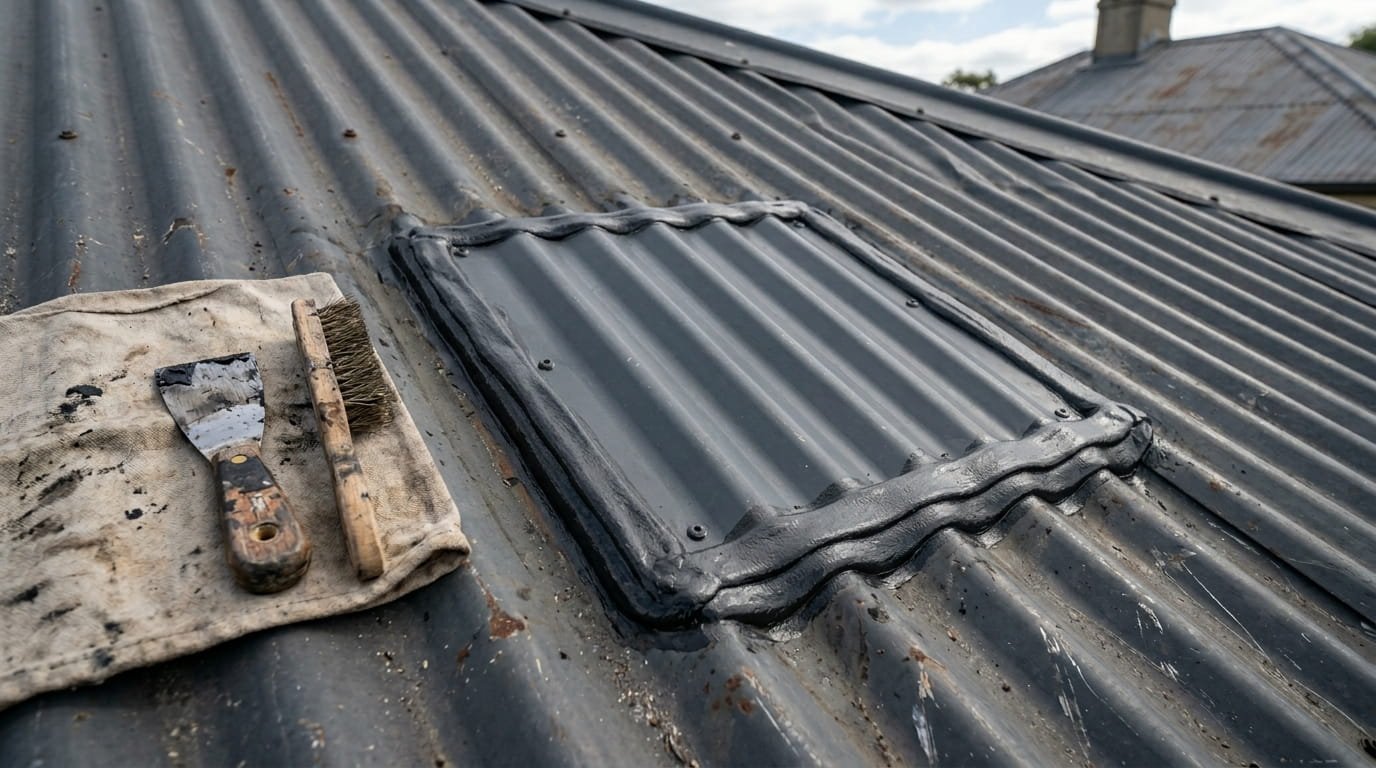
Clean the damaged area thoroughly and remove any loose rust or debris. Cut a metal patch slightly larger than the damage, extending at least two to three inches beyond the damaged area in every direction. Apply roofing cement or butyl tape to the back of the patch, press firmly into place, and seal all edges. For holes larger than six inches, call a professional.
Fix 4: Replace Flashing (Difficulty: Moderate to Hard)
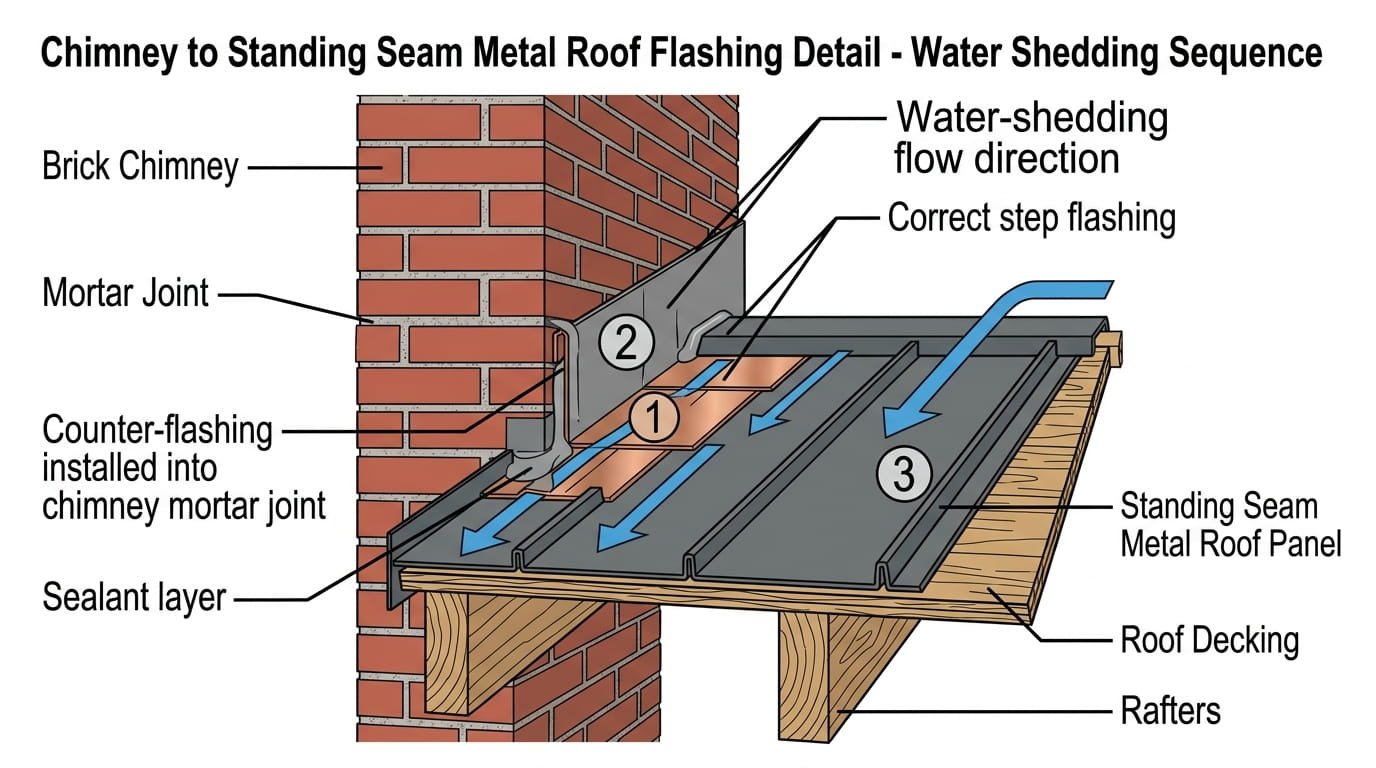
Carefully remove the old flashing without disturbing the surrounding panels. Install new flashing using the correct overlapping sequence so water always sheds over, never under, the adjacent material. Seal all edges with a compatible sealant and allow full curing time before testing. If multiple flashing sections are failing simultaneously, this is often a sign of a larger installation issue. Consider scheduling a professional roofing inspection to assess the scope of the problem.
Fix 5: Address Rust Spots (Difficulty: Moderate)
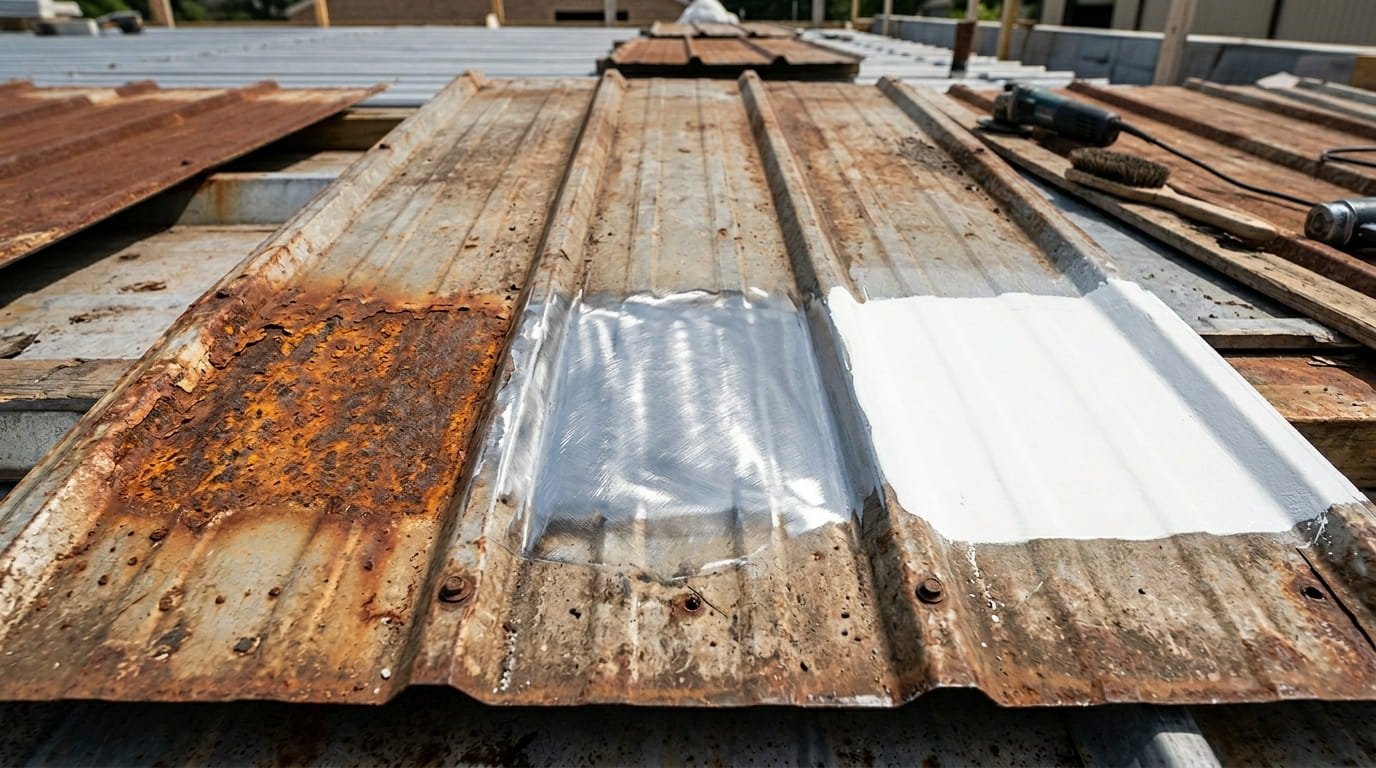
Use a wire brush or grinder to remove all visible rust down to bare, clean metal. Apply a rust-inhibiting primer and allow it to dry fully before applying an elastomeric roof coating over the treated area. This seals the surface and prevents oxygen from reaching the metal again. Address rust early. A small spot today can become a structural problem in a few seasons if ignored.
Fix 6: Reseal or Replace Ridge Caps (Difficulty: Moderate)
Inspect ridge cap fasteners and re-seat any that have lifted or shifted. Apply fresh sealant along all edges of the cap where it contacts the panels below. If a cap is badly bent or corroded, full replacement is the right call. A loose ridge cap is one of the fastest ways for wind-driven rain to find its way into your home.
DIY vs. Professional Repair: When to Call a Pro

Not every metal roof leak is a weekend project. Some repairs require professional equipment, experience, and insurance. Use this table to quickly assess whether your situation calls for DIY effort or a phone call.
| Repair Type | DIY Option | Pro Needed | Notes |
| Caulk or Sealant Repair | Yes | Sometimes | Small isolated areas may be manageable |
| Fastener Tightening | Yes | Sometimes | Repeated loosening may point to a larger issue |
| Small Patch Repair | Yes | Sometimes | Best only for minor damage |
| Flashing Replacement | Maybe | Yes | Depends on location and extent of failure |
| Panel Replacement | No | Yes | Usually requires proper fitting and sealing |
| Structural Damage | No | Yes | Needs immediate professional attention |
Beyond the repair type, there are situations where a pro is the right call regardless of what is broken. If you are seeing multiple leaks in different zones, if you cannot safely access the roof, if a DIY repair has failed to stop the leak, or if water has already reached your walls or insulation, it is time to stop doing it yourself. Our team at EZ Roofing & Builders handles everything from targeted roofing repairs to full roof replacement across Long Island and the surrounding area.
How to Prevent Metal Roof Leaks: A Seasonal Maintenance Calendar
The best leak repair is the one you never have to make. A simple seasonal routine dramatically extends the life of your metal roof and catches problems before they become expensive. Here is what to do each quarter:
Spring
Winter is hard on metal roofs. In spring, walk the roof and check for any panels shifted by ice or heavy snow loads. Clear all debris that accumulated over winter and inspect seams carefully after the freeze-thaw cycle, which puts enormous stress on fasteners and sealants.
Summer
Heat accelerates sealant degradation and fastener expansion. In summer, inspect all caulked areas for cracking and pull any screws that appear to be backing out. Clear gutters before storm season begins so water has a clear path off the roof.
Fall
Fall is the most important maintenance window. Clean gutters thoroughly and check all flashing before the rain season arrives. Look for the first signs of rust forming at seams, which are much easier to treat when caught early. If you have had any storm damage over the summer, fall is the time to address it before winter makes conditions worse.
Winter
Inspect your attic for condensation buildup, which can be mistaken for a leak but is actually a ventilation problem. If you live in a snow-prone area, watch for ice dam formation at the eaves. Improving attic insulation and ventilation is the only permanent fix for ice dams.
How Long Will a Metal Roof Repair Last?
This is a question every homeowner deserves a straight answer to, and it is one that almost no other guide bothers to address. The longevity of your repair depends heavily on the type of fix and the quality of materials used.
| Repair Type | Expected Lifespan |
| Caulk/Sealant Repairs | 5 to 10 years if done correctly |
| Fastener Replacement | 10 to 15 years |
| Flashing Replacement | 15 to 20 years |
| Full Coating Application | 10 to 20 years depending on product |
If you find yourself making the same repair repeatedly, that pattern is telling you something. Recurring leaks in the same area often point to a deeper structural issue or a fundamentally flawed installation. At some point, ongoing repair costs outpace the cost of a full replacement. Our team can help you run that analysis honestly and recommend the right path forward, whether that is a targeted fix or exploring your metal roofing options for a complete system upgrade.
Frequently Asked Questions
Do metal roofs leak more than shingles?
Metal roofs leak less frequently than asphalt shingles, yes. Metal roofs have significantly fewer surface vulnerabilities and a much longer lifespan. When they do leak, it is almost always at a connection point rather than through the panel material itself.
What is the most common cause of metal roof leaks?
Failed sealant around penetrations and loose or degraded fasteners are the two most common culprits. Both are preventable with regular maintenance and caught early through routine inspections.
Can I fix a metal roof leak myself?
Many common repairs, including re-caulking around vents, tightening fasteners, and patching small holes, are well within the reach of a capable DIYer with the right materials and safety equipment. Larger structural repairs, full flashing replacement, or panel replacement should always be handled by a licensed contractor.
How do I find a leak in a metal roof without going on the roof?
Start in the attic. Water stains, damp insulation, and mold smell will point you toward the general area of the leak. From the ground, use binoculars to scan the roof for rust streaks, lifted panels, and missing caps. The garden hose test can then help you narrow it down to the precise entry point. Knowing how to find a leak in a metal roof from the inside first dramatically reduces the time you need to spend on top.
What is the best sealant for a metal roof leak?
Polyurethane and silicone sealants rated specifically for metal roofing are your best options. Look for products that offer UV resistance and remain flexible across a wide temperature range. Avoid general-purpose caulks, which will crack and fail far sooner in roofing applications.
How much does it cost to repair a metal roof leak?
Minor repairs like re-caulking or fastener replacement typically run between $150 and $500 depending on the scope. Flashing repairs can range from $300 to $1,500. Full panel replacement or structural work can cost several thousand dollars. A professional inspection gives you an accurate picture so there are no surprises.
Ready to Stop That Leak for Good?
At EZ Roofing & Builders, we have served homeowners across Long Island, Nassau County, Queens County, and Suffolk County for years, delivering honest assessments, quality craftsmanship, and repairs that actually hold up. Whether you need a quick sealant touch-up, flashing replacement, or a full roof replacement, we bring the same level of care to every job.
Our team offers roofing inspection service with no pressure and no hidden fees. We stand behind our work with strong warranties because we know that a roof you can rely on is not a luxury. It is a necessity. Reach out to EZ Roofing & Builders NY today and let us take the worry off your plate.