Key Takeaways
- Always use coverage width, not full width, when calculating how many sheets you need. Using full width will leave you short on material.
- Roof pitch changes your actual surface area. A 6/12 pitched roof has 12% more surface area than its floor footprint suggests.
- Add a waste factor of 10% for simple gable roofs and 15% for complex roofs with hips, valleys, or dormers.
- Standard residential panels are typically 36 inches wide with 34 to 35 inches of effective coverage, and come in lengths from 8 to 16 feet.
- 24-gauge steel is the sweet spot for most homeowners and strong enough for wind and weather, without the extra cost of heavier commercial gauges.
- Order all materials together including underlayment, ridge caps, and flashing to avoid color and batch mismatches.
Introduction
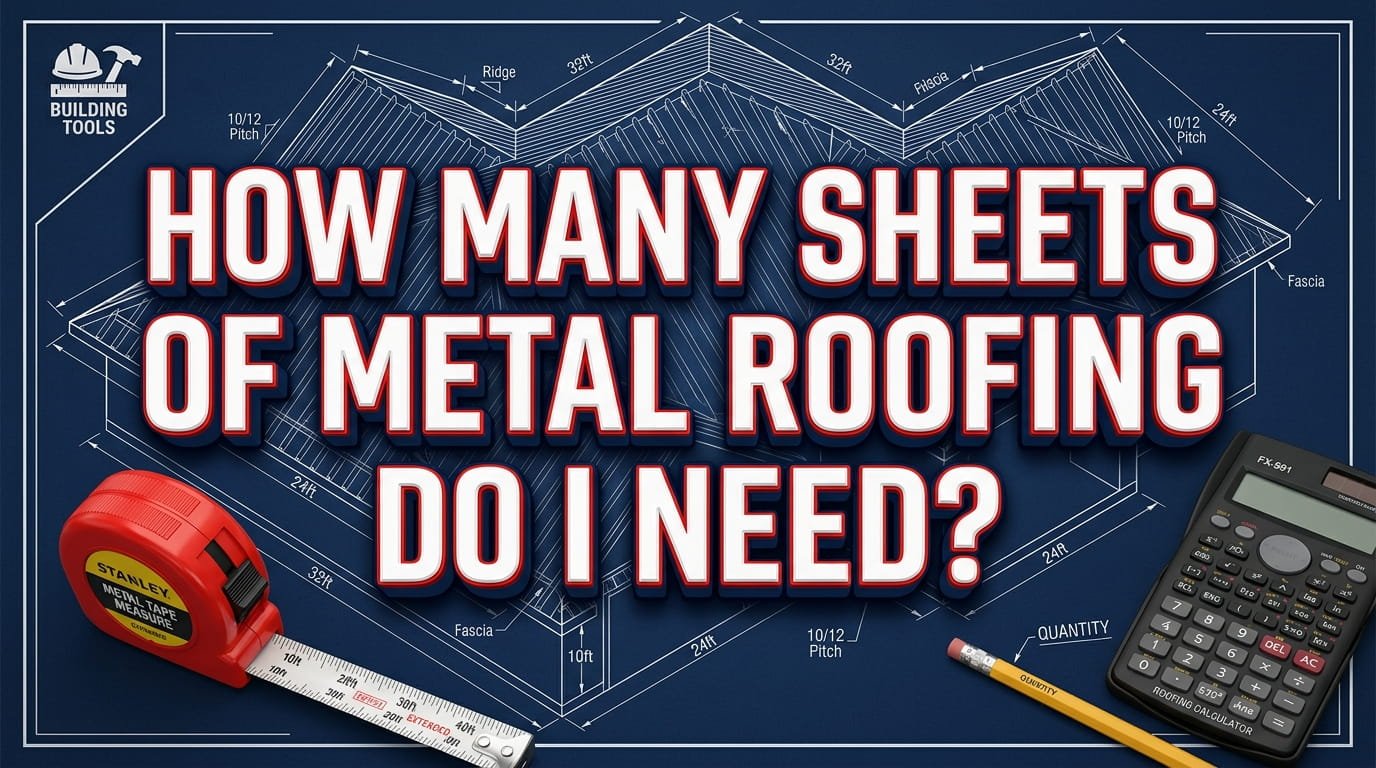
Figuring out how many sheets of metal roofing do I need is one of those questions that sounds straightforward until you actually try to answer it. The truth is, ordering the wrong number of sheets is one of the costliest mistakes you can make in a roofing project.
Order too few, and your project stalls while you wait for a reorder, often from a different production batch that does not quite match in color. Order too many, and you are stuck with leftover material that represents real money sitting in your garage. Neither situation is fun, and both are completely avoidable with the right approach.
The good news is that calculating how much metal roofing I need is not as complicated as it might seem. Once you understand metal roofing sheet sizes, how pitch affects your actual roof area, and how to apply a simple waste factor, the whole process becomes logical and repeatable.
Metal roofs last two to three times longer than traditional asphalt shingles, making accurate material planning even more important since this is a long-term investment you want to get right the first time.
Whether you are planning a new installation or a full replacement, this guide walks you through every step, from understanding roof sheet sizes in feet to getting your final sheet count, so keep reading and let’s get your numbers dialed in.
What Are Standard Metal Roofing Sheet Sizes?
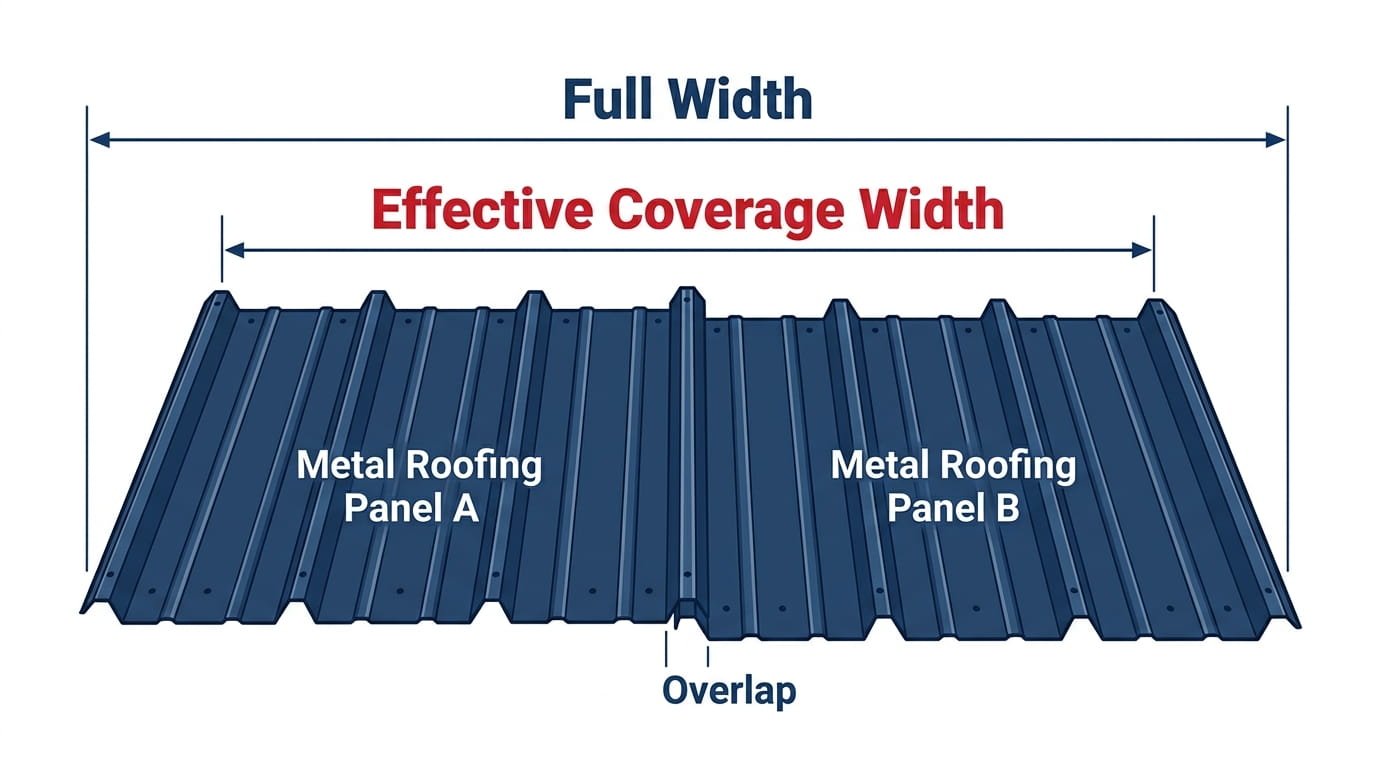
When people talk about metal roofing size, they often assume the width stamped on a panel is the same as how much roof it actually covers. That assumption leads to short orders and frustrated contractors. Every metal panel has two measurements you need to know: its full width and its effective coverage width.
The full width is the total edge-to-edge dimension of the panel. The coverage width is the actual usable coverage after accounting for the overlap at the seams, where one panel laps over the edge of the next. These two numbers are never the same, and for your calculations, only the coverage width matters.
Understanding standard metal roofing sheet sizes gives you a reliable starting point before you measure a single inch of your roof. The most common full widths in residential and commercial metal roofing are 24 inches, 26 inches, and 36 inches.
Standard lengths come in 8 ft, 10 ft, 12 ft, and 16 ft increments, though many suppliers also offer custom-cut panels to match your exact roof length. Custom lengths are especially useful on standing seam systems where you want to run a single panel from ridge to eave with no mid-roof seam.
Here is a clear breakdown of roof sheet sizes in feet by panel type:
| Panel Type | Full Width | Coverage Width | Common Lengths |
| Corrugated | 26″–39″ | 24″–36″ | 6–20 ft |
| R-Panel / PBR | 36″ | 34″–35″ | Custom cut |
| Standing Seam | 12″–18″ | 12″–18″ | Custom cut |
| Box Profile | 40″ | 39″ | Up to 30 ft |
One critical note worth repeating: always use coverage width, not full width, when doing your calculations. If you use the full 36-inch width of an R-panel instead of its 34-inch coverage width, you will undercount your sheet needs and find yourself short at the worst possible time.
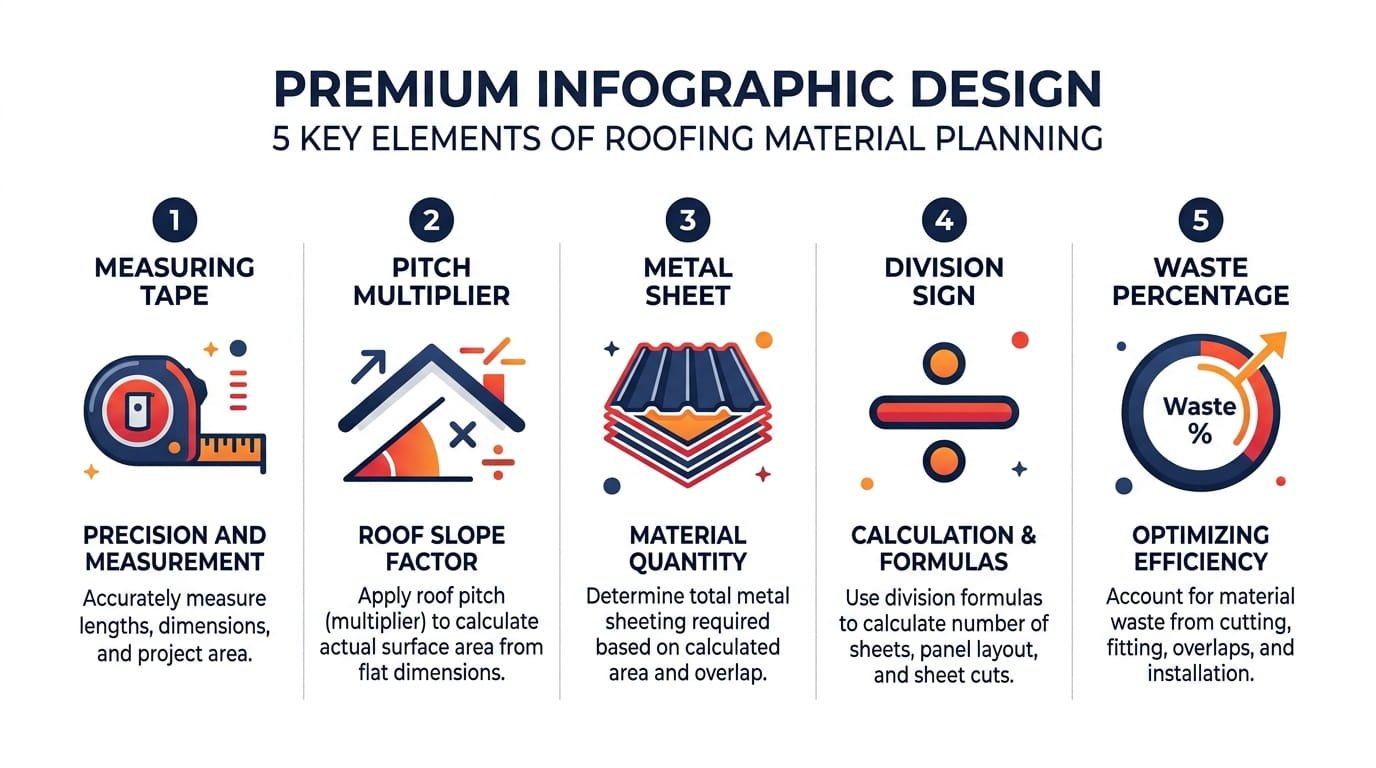
How to Calculate How Much Metal Roofing You Need (Step by Step)
Now that you know your sizes, it’s time to actually run the calculation. Follow each step in order, and by the end you will have a precise sheet count you can bring to your supplier with confidence.
Step 1: Measure Your Roof Sections
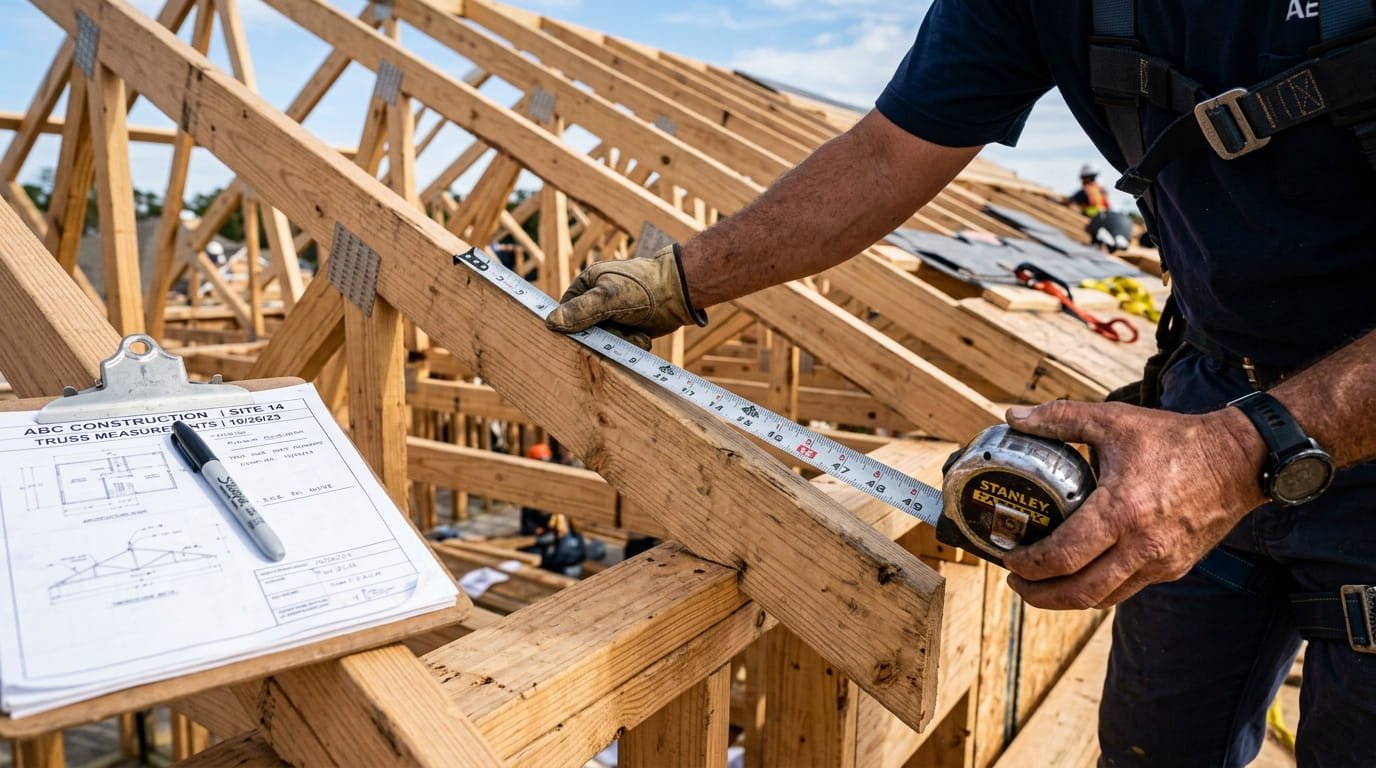
Start on the ground if you need to. The simplest approach is to measure the footprint of your house, meaning the length and width of the floor area below each roof slope. Multiply length by width to get the square footage for each section.
If your roof has multiple sections, such as a main gable, a garage addition, and a dormer, measure each one separately and add them together. Do not try to eyeball a combined total from the ground because roofs rarely have perfectly matching sections.
A tape measure and a notepad are all you need for this step, and if you genuinely cannot get on the roof safely, the footprint method gives you a solid working estimate that you can refine with your contractor.
Step 2: Apply the Roof Pitch Multiplier
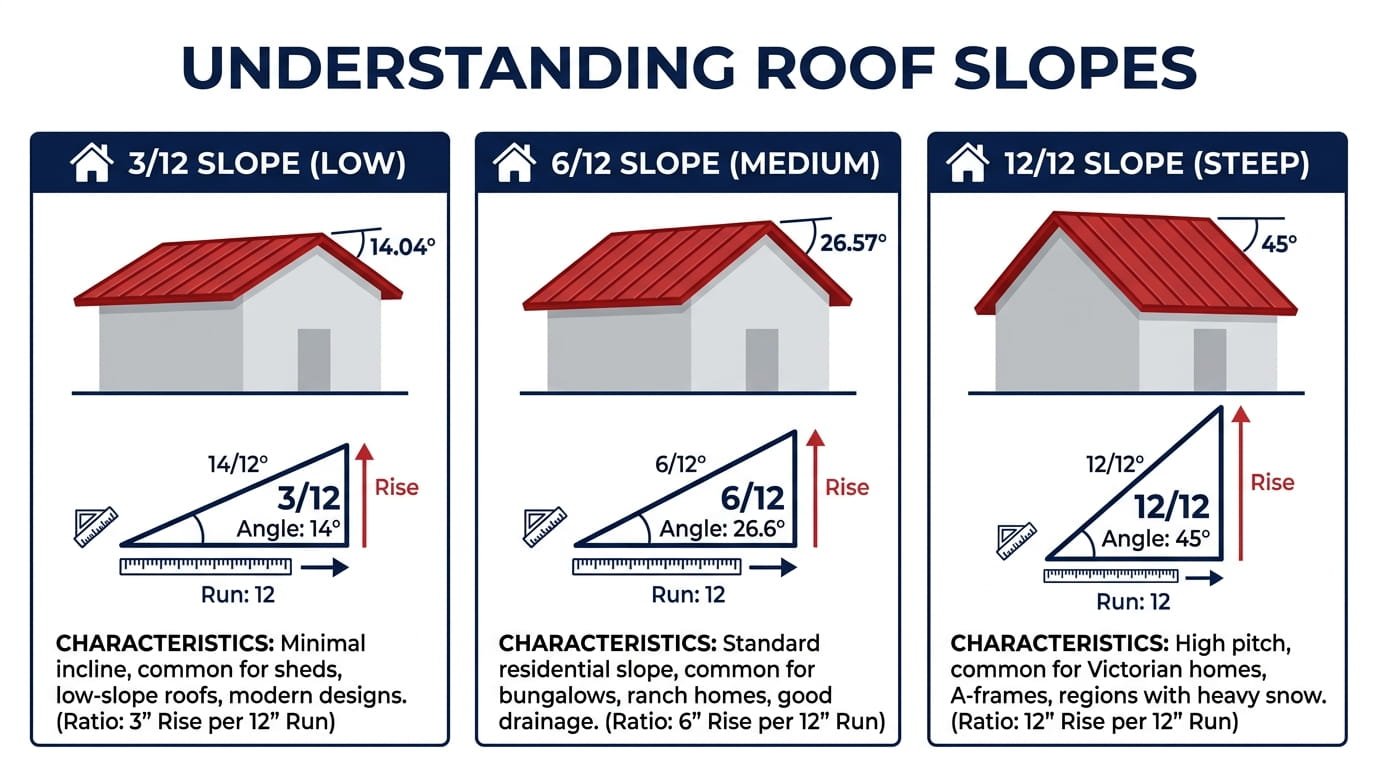
Here is something that surprises a lot of homeowners: a sloped roof always covers more actual surface area than its flat footprint suggests. The steeper the pitch, the bigger that difference gets.
A perfectly flat roof has a multiplier of 1.0, meaning what you measured on the ground is what you have. But a 6/12 pitch roof, which is a very common residential slope, has a multiplier of 1.12, meaning the real surface area is 12% larger than your footprint calculation.
Use this table to find the right multiplier for your roof:
| Roof Pitch | Multiplier |
| 3/12 | 1.03 |
| 4/12 | 1.05 |
| 5/12 | 1.08 |
| 6/12 | 1.12 |
| 8/12 | 1.20 |
| 10/12 | 1.30 |
| 12/12 | 1.41 |
Formula: Footprint sq ft × Pitch Multiplier = Actual Roof Area
Step 3: Find Your Sheet’s Coverage Area
Once you know your actual roof area, you need to figure out how much square footage each individual sheet covers. This is a simple formula using the coverage width (not the full width) and the sheet length you plan to order.
Formula: Coverage Width (inches) ÷ 12 × Sheet Length (ft) = Sq Ft per Sheet
Example: A panel with 36 inches of coverage width and a 12-foot length covers 3 × 12 = 36 square feet per sheet.
Again, make sure you are using the coverage width from the table above, not the printed full width on the product spec sheet.
Step 4: Divide Roof Area by Sheet Coverage
This step gives you your raw sheet count. Take the actual roof area you calculated in Step 2 and divide it by the square footage per sheet from Step 3.
Formula: Total Roof Area ÷ Sq Ft Per Sheet = Number of Sheets
Always round this number up to the nearest whole number. You cannot buy half a sheet, and erring on the side of one extra is always better than coming up one short.
Step 5: Add Waste Factor
No matter how precise your measurements are, there will always be cuts, trim pieces, and off-cuts that cannot be reused. This is where the waste factor comes in.
Here is the standard rule:
- Simple roof (rectangular or basic gable shape): Add 10%
- Complex roof (hips, valleys, multiple dormers, steep pitch): Add 15%
Final Formula:
Sheets Needed = (Roof Area × Pitch Multiplier) ÷ Sheet Coverage × 1.10
Use 1.15 in place of 1.10 for complex roofs.
Worked Example for Simple Gable Roof
Let’s put all five steps together with real numbers so you can see exactly how this works.
Your roof: 40 ft long × 30 ft wide gable, 6/12 pitch, using 36-inch wide R-panels (34 inches coverage width) in 12-foot lengths.
Step 1 — Footprint area: 40 × 30 = 1,200 sq ft (for one slope). Since a gable has two slopes, total footprint = 2,400 sq ft.
Step 2 — Apply pitch multiplier: 2,400 × 1.12 = 2,688 sq ft actual roof area.
Step 3 — Sheet coverage: 34 ÷ 12 × 12 = 34 sq ft per sheet.
Step 4 — Raw sheet count: 2,688 ÷ 34 = 79.06 → Round up to 80 sheets.
Step 5 — Add 10% waste: 80 × 1.10 = 88 sheets.
Your final order is 88 sheets. That is the number you bring to your supplier.
Metal Roofing Sheet Sizes by Panel Type
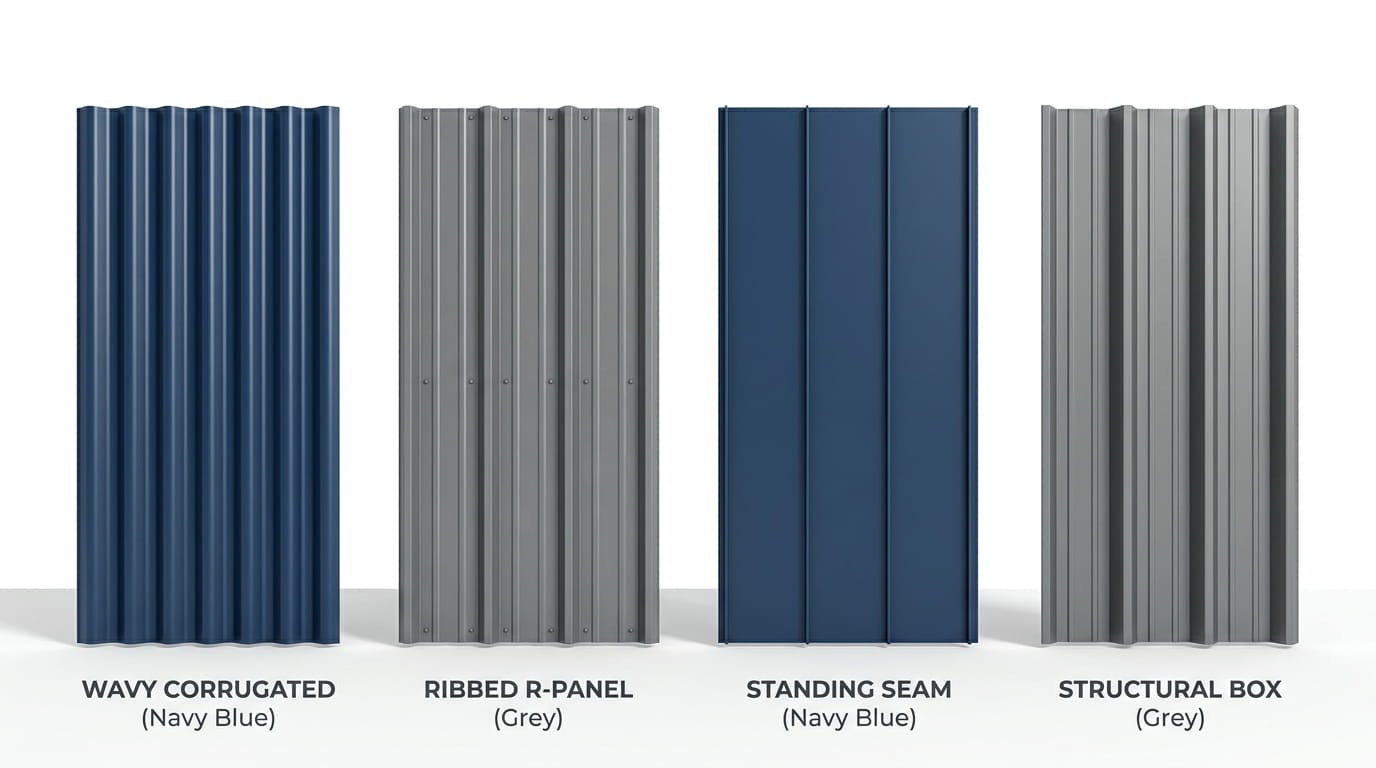
Not all metal panels are built the same, and the metal roof sizes sheet you choose will affect everything from how many sheets you need to how long the installation takes. Here is a breakdown of the four main panel categories and their standard dimensions.
Corrugated Metal Roofing Sheet Sizes
Corrugated panels are the classic wavy-profile sheets you have probably seen on barns and farmhouses for decades. Their full width runs from 26 to 39 inches depending on the manufacturer, with effective coverage widths of 24 to 36 inches. Standard lengths go up to 20 feet, making them flexible for a wide range of roof spans.
They work well on residential homes, agricultural buildings, and light industrial structures. One thing to keep in mind: corrugated panels require a minimum roof pitch of about 10 degrees to ensure proper water runoff. If your roof is flatter than that, you will want to look at a different panel profile.
R-Panel / PBR Panel Sizes
R-panels (also called PBR panels) are workhorses of the commercial roofing world, though they show up on residential projects too. The standard full width is 36 inches with a coverage width of approximately 34 inches. Lengths are typically custom-cut to order, with many fabricators offering panels up to 40 feet long.
They install quickly, use exposed fasteners for straightforward attachment, and hold up well in high-wind environments. Agricultural buildings, warehouses, and rural homes are the most common applications.
Standing Seam Panel Sizes
Standing seam is the premium option, and for good reason. These panels have concealed fasteners, which means no exposed screws to rust or back out over time. Panel widths run from 12 to 18 inches, and because they are almost always custom-cut to the exact length of your roof slope, there are no mid-roof horizontal seams to worry about.
They are a top choice for high-end residential projects and work particularly well on low-pitch roofs with a minimum of 4 degrees of slope.
Box Profile Sizes
Box profile panels have a deeper, more angular rib than corrugated panels, which gives them added structural rigidity. Coverage widths typically run from 36 to 40 inches, and maximum lengths go up to 30 feet.
They come in steel thicknesses of 0.5mm to 0.7mm, making them a solid choice for both commercial and agricultural applications where you need a panel that can handle snow loads, wind pressure, and years of weather exposure without warping.
Metal Roofing Sheet Thickness and Gauge — Which Should You Choose?
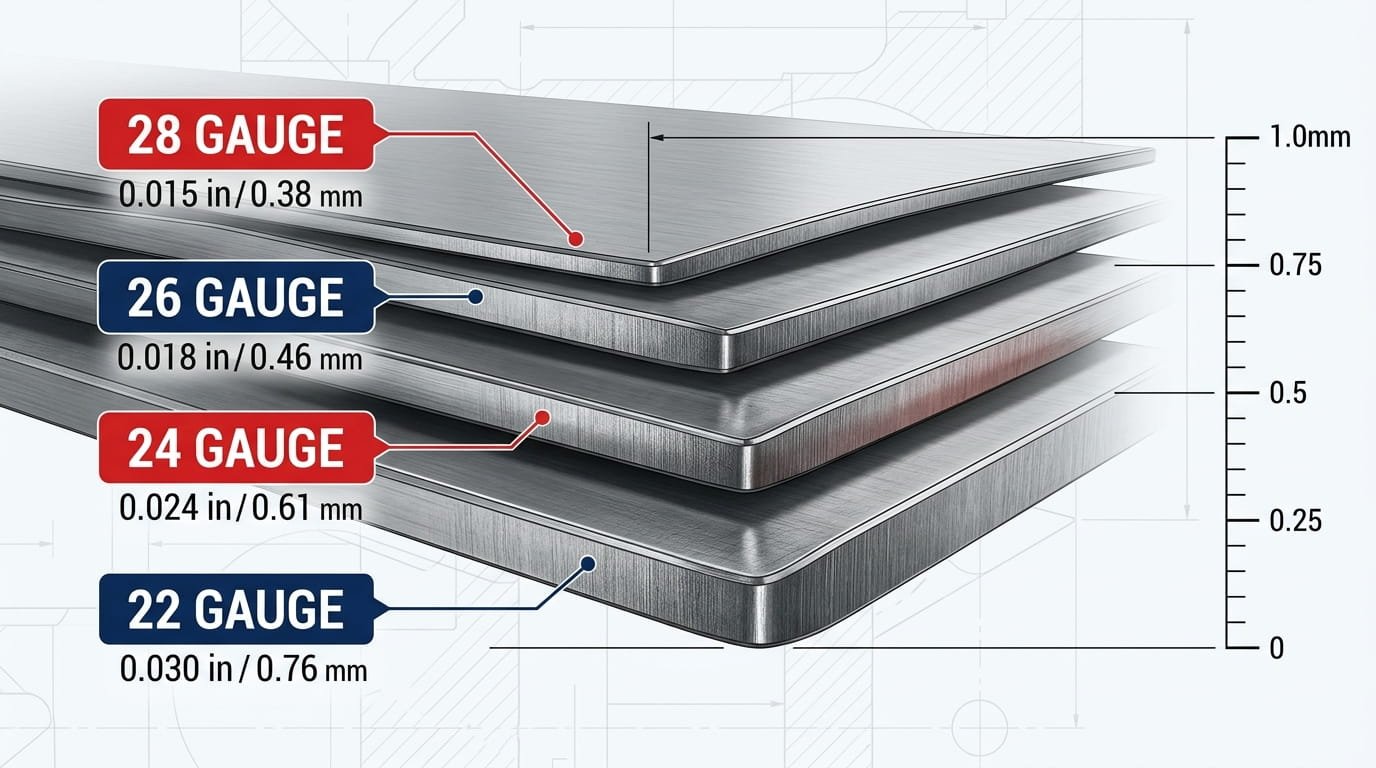
Gauge is the measurement system used for metal roofing thickness, and it works in a slightly counterintuitive way: the lower the gauge number, the thicker the metal. A 22-gauge panel is thicker and heavier than a 26-gauge panel, not the other way around.
Here is a quick reference table for the most common gauges:
| Gauge | Thickness (mm) | Best For |
| 22 | 0.85mm | Heavy commercial |
| 24 | 0.71mm | High-wind residential |
| 26 | 0.55mm | Standard residential |
| 28 | 0.38mm | Light-duty / wall cladding |
For most homeowners, 24-gauge steel is the right call. It hits the sweet spot between durability and cost, handles high winds and hail better than 26-gauge, and is not as heavy or expensive as 22-gauge commercial panels. If you live in an area prone to severe weather, the upgrade from 26 to 24 gauge is usually worth every penny.
One other thing worth noting: thicker gauge panels tend to hold their shape better during installation, which means less flex and a tighter, more consistent seam. It is a small detail, but it matters over the life of the roof.
Don’t Forget These Additional Materials
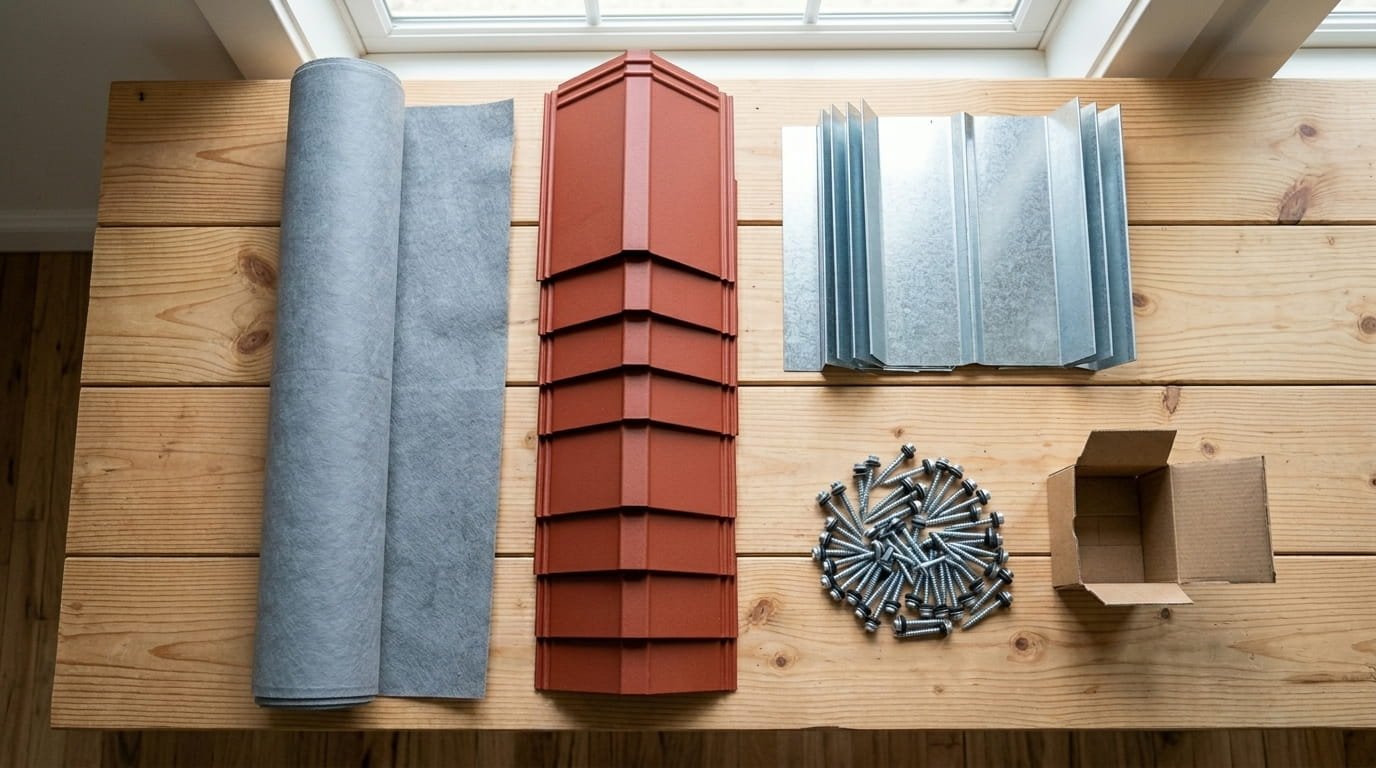
Knowing how much metal roofing I need gets you the panels, but the panels are only part of what you actually need to complete the job. Many homeowners price out their sheet count and then get surprised by the cost of everything else. Here is what else to put on your material list.
Getting all of this right before you start ordering is the difference between a smooth project and a frustrating one. Here is what you should be accounting for alongside your sheet order:
- Screws and Fasteners: Plan for roughly 80 screws per roofing square (100 sq ft). Always order a few extra boxes since screws get dropped, stripped, and miscounted.
- Underlayment: Order the same square footage as your total roof area, then add 10% to account for overlapping seams. Proper underlayment is critical for moisture protection under metal panels.
- Ridge Cap: Measure your ridge line in linear feet. Every peak where two roof slopes meet needs a dedicated cap piece, and these come in standard lengths you will need to account for.
- Flashing: Measure all valleys, roof edges, and any penetrations like chimneys, vents, or skylights in linear feet. Flashing keeps water out at every transition point.
- Trim Pieces: Walk the perimeter of your roof and measure the total linear footage. Edge trim gives your installation a clean, finished look and protects panel edges from uplift.
One practical tip: order everything together in a single shipment if you can. Metal panels and trim pieces are color-matched at the factory, and if you place a second order weeks later, you may get a batch with a slightly different finish that is visible from the ground. Our roof maintenance page has useful guidance on what to watch for after installation as well.
If you ever find yourself dealing with urgent damage while planning a replacement, it is also worth knowing that EZ Roofing & Builders offers emergency roofing services to protect your home in the meantime.
Conclusion
Calculating your metal roofing needs comes down to a clear three-part formula: find your actual roof area using your footprint measurement and the right pitch multiplier, divide that number by the square footage each panel covers using its coverage width, and then apply a 10 to 15 percent waste factor to protect yourself from shortfalls. Run through those steps carefully, and you will have a number you can order with real confidence.
It might feel like a lot of steps the first time, but once you have done it once with your own numbers, the logic clicks and the whole calculation takes maybe 20 minutes. Getting this right upfront saves you from delays, mismatched batches, and unnecessary spending. If you want a professional set of eyes on your metal roof before you commit to an order, the team at EZ Roofing & Builders is happy to help. No pressure, just accurate numbers and honest advice for your project.
Frequently Asked Questions
Q: How many sheets of metal roofing do I need for a 1,000 sq ft roof?
For a 1,000 sq ft roof with a moderate pitch and standard 36-inch R-panels at 12-foot lengths (34 sq ft of coverage per sheet), you would need approximately 1,000 ÷ 34 = 30 sheets before waste. Adding a 10% waste factor for a simple gable brings your total to about 33 sheets. Always round up and confirm with your actual pitch multiplier for an accurate final count.
Q: What is the standard metal roofing sheet size in feet?
The most common residential size is 3 ft wide by 12 ft long, based on a 36-inch full-width panel in a 12-foot length. However, custom lengths from 8 ft to 20 ft or more are widely available, and many standing seam installations use panels cut to the exact slope length of the roof so there are no horizontal seams at all.
Q: How much waste should I add when calculating metal roofing?
For simple rectangular or gable roofs, a 10% waste factor is the standard. For complex roofs with multiple hips, valleys, dormers, or awkward angles, bump that up to 15%. Cutting panels around penetrations and angles creates off-cuts that generally cannot be reused elsewhere on the roof.