Noticed brown stains on your ceiling after a rainstorm? Found piles of granules in your gutters? These are not just cosmetic annoyances, they are your roof sending out an urgent distress signal. A small, ignored leak today can turn into a $10,000 structural repair six months from now.
By the end, you will have a clear action plan to protect one of the biggest investments you will ever make.
Signs Your Roof Needs Repair
Most roof problems start small and invisible. Catching them early is the difference between a $300 shingle replacement and a $6,000 deck repair. Here is where to look:
Interior Warning Signs
Before you even step outside, your home’s interior can reveal a damaged roof:
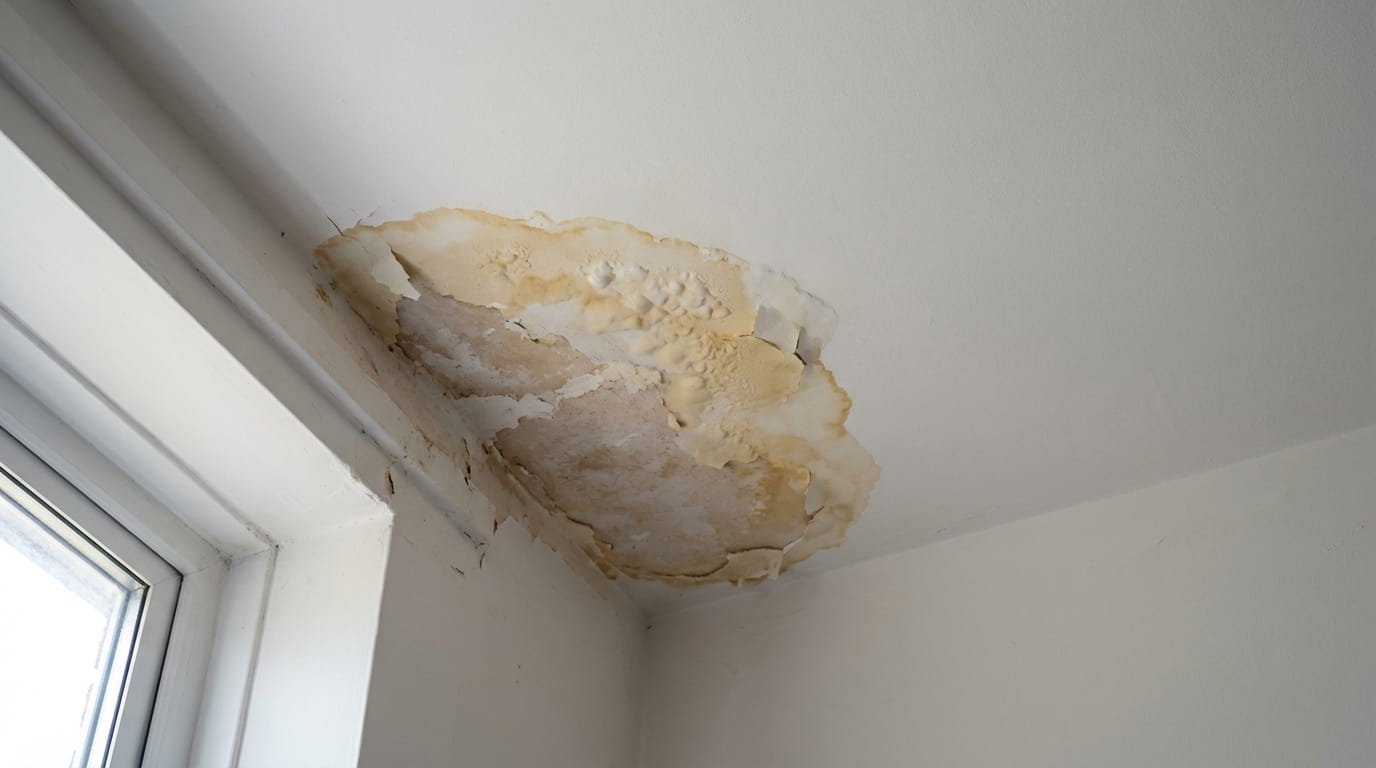
- Water stains or brown rings on ceilings and walls
- Musty or damp odors in the attic, especially after rain
- Dripping water from light fixtures or vents during a storm
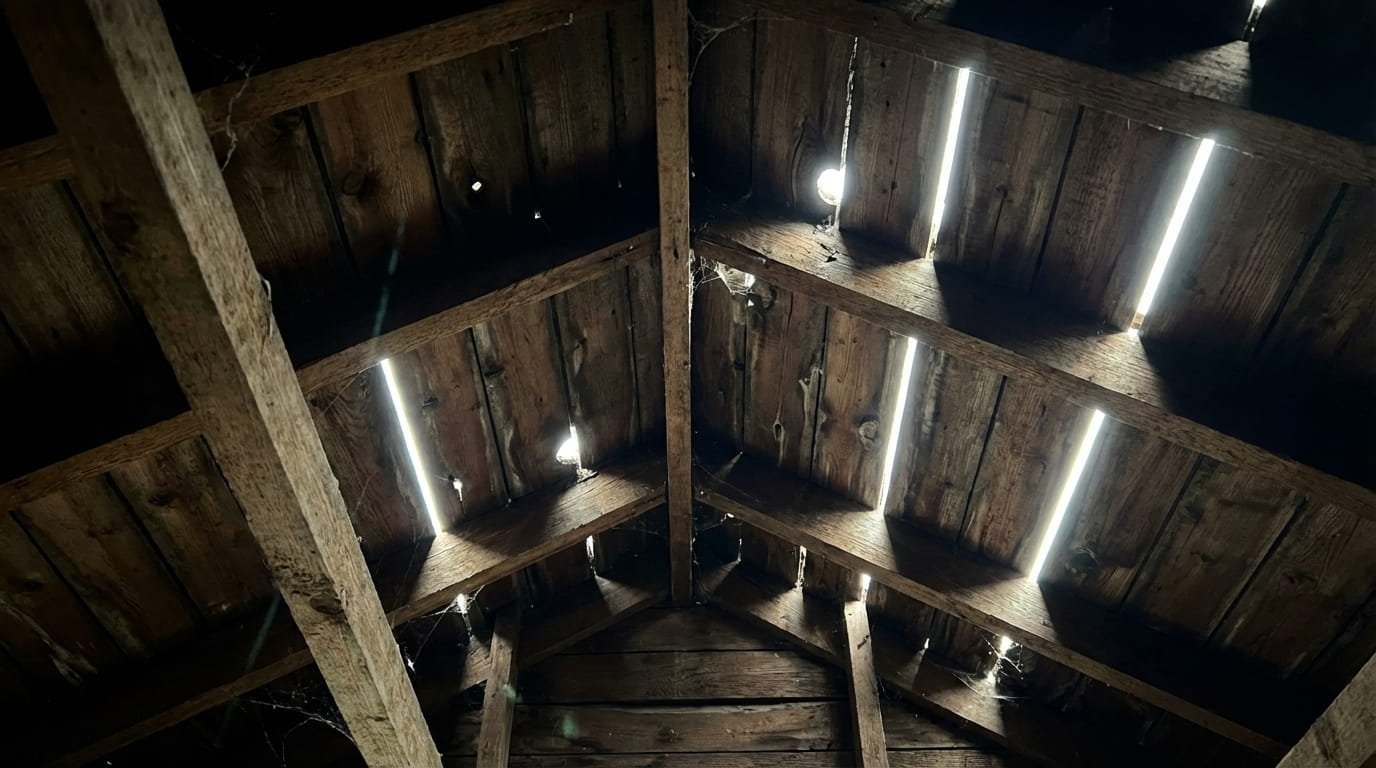
- Daylight visible through attic boards. If you can see the sky, water is already getting in.
- Peeling paint or bubbling drywall on upper-floor ceilings
Exterior Warning Signs
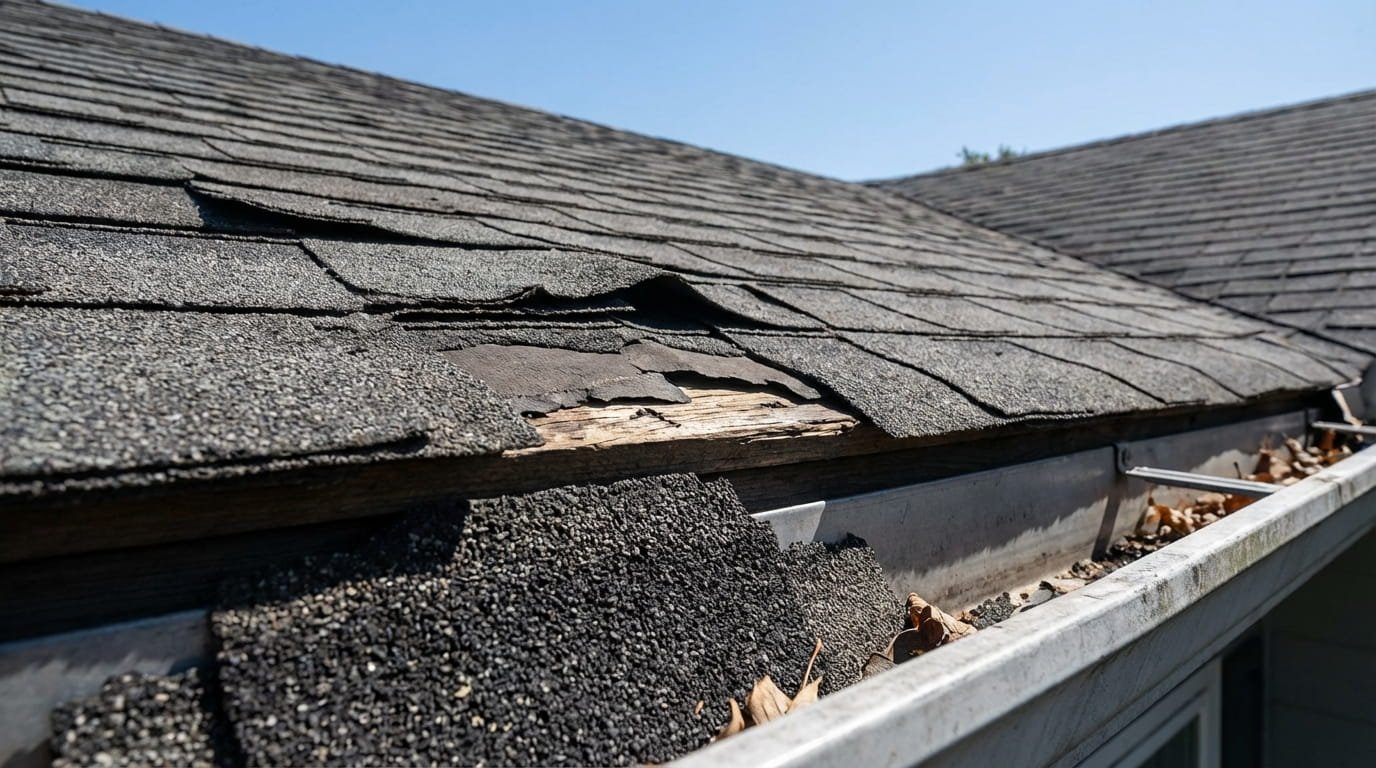
Once a month, and after every major storm, do a visual scan of your roof from the ground:
- Missing, cracked, curling, or buckling shingles
- Granules (sandy grit) accumulating in gutters or downspouts
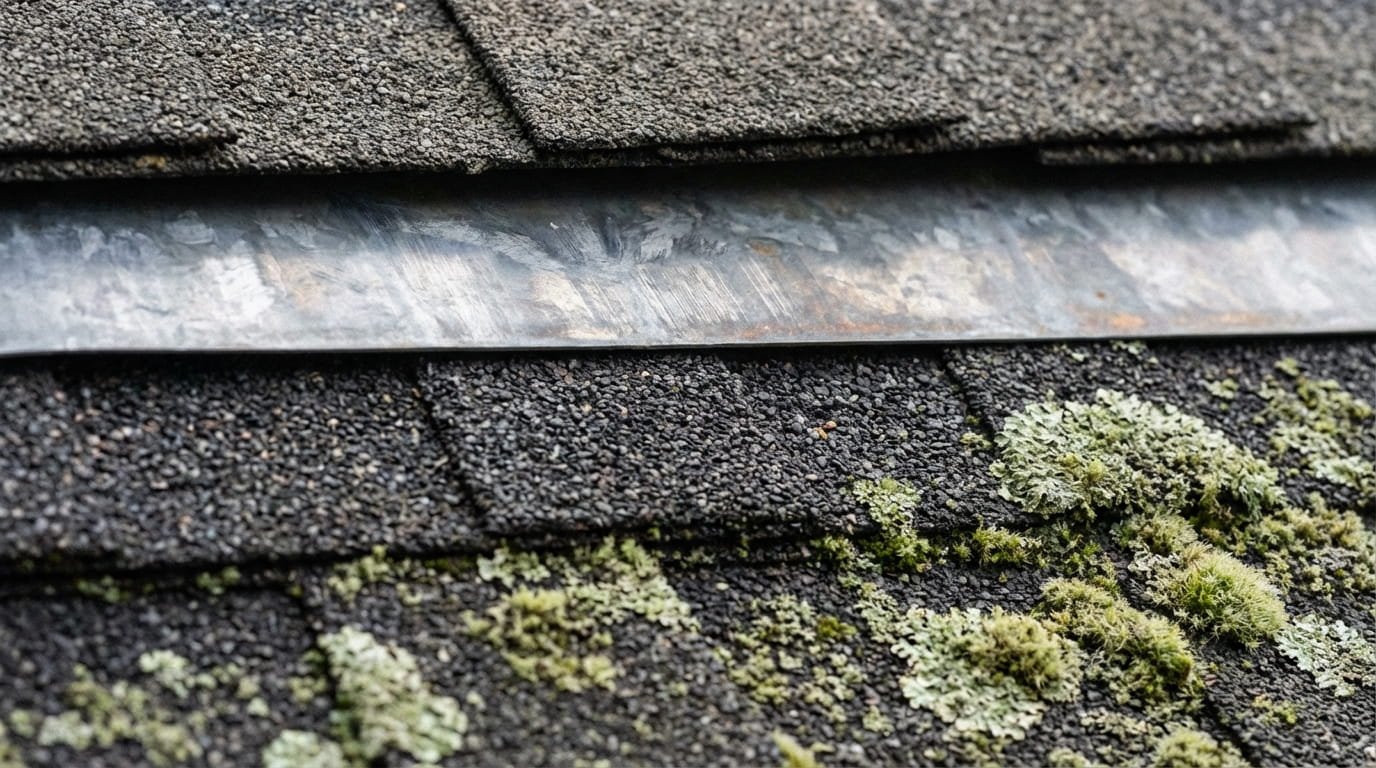
- Moss, algae, or dark streaks growing across shingles
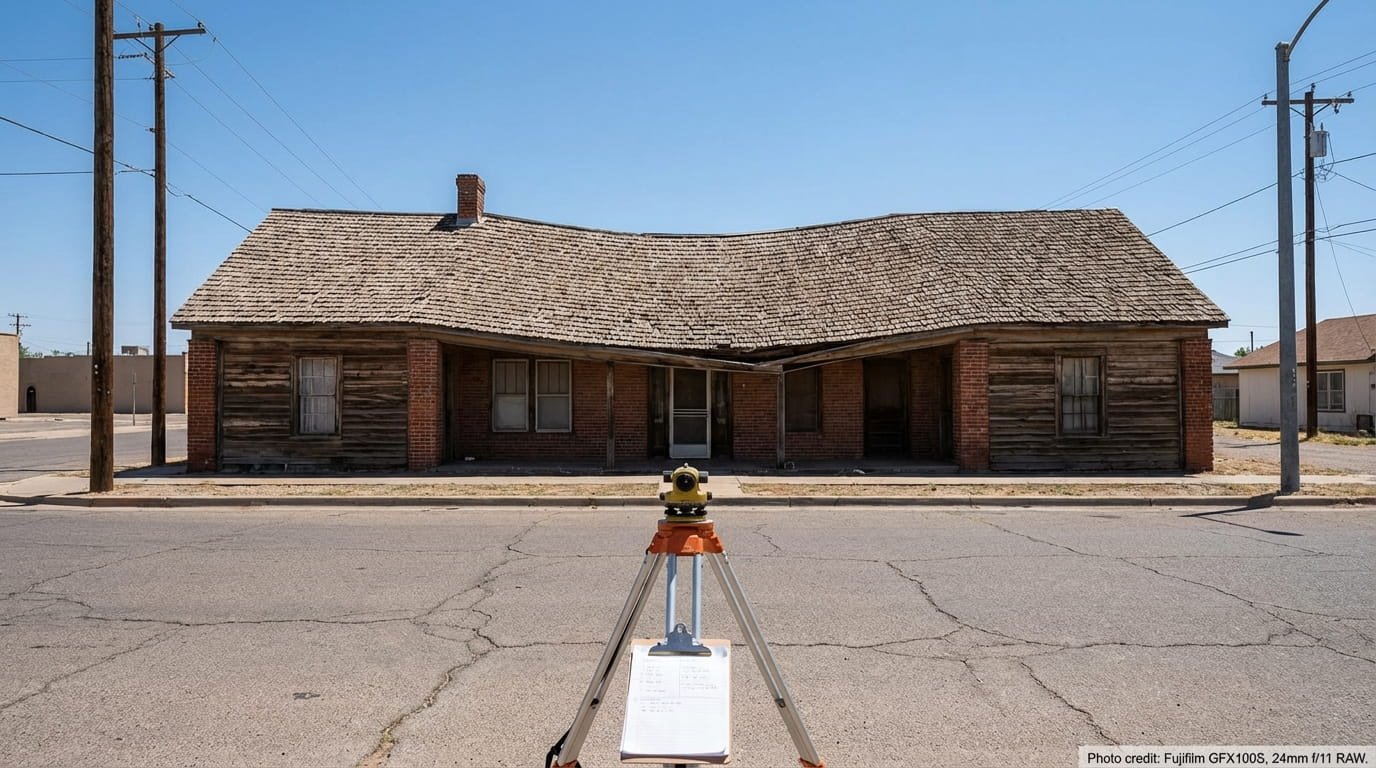
- Sagging or uneven areas on the roofline
- Rust stains around vents, skylights, or chimney flashing
Structural Warning Signs
These are the most serious and require immediate professional attention:
- A roofline that sags, dips, or appears wavy
- Soft or bouncy spots when walking on the roof
- Visible rot or water damage on exposed decking
- Flashing that has separated, lifted, or corroded around the chimney or vents
Quick reference. Use this table to gauge urgency:
| Warning Sign | What It Indicates | Urgency |
|---|---|---|
| Daylight through attic boards | Active water entry point | HIGH, Act within days |
| Water stains on ceiling | Roof leak present | HIGH, Inspect immediately |
| Missing or cracked shingles | Weather damage, exposed underlayment | HIGH, Replace soon |
| Granules in gutters | Shingles aging, losing protection | MEDIUM, Plan repair |
| Sagging roofline | Structural or moisture damage | HIGH, Call a pro now |
| Moss or algae growth | Trapped moisture, gradual decay | MEDIUM, Clean and treat |
| Rust around flashing | Possible water entry at joints | MEDIUM, Inspect flashing |
If your roof is over 20 years old and showing two or more of the above signs simultaneously, it may be approaching the end of its serviceable life. A professional roof inspection will tell you whether a repair or a full replacement makes more financial sense.
Types of Roof Damage That Can Be Repaired
Not all roof damage is created equal. Some problems are simple, affordable DIY fixes. Others require professional attention. Knowing the difference saves you both time and money. For a detailed breakdown of every damage type, see our guide on what roof damage is repairable.
| Damage Type | Repairable? | Typical Complexity |
|---|---|---|
| Missing or damaged shingles | Yes | Low, DIY-friendly |
| Small leaks (isolated area) | Yes | Low to Medium |
| Damaged flashing | Yes | Medium |
| Clogged or damaged gutters | Yes | Low, DIY-friendly |
| Cracked or missing roof vents | Yes | Low to Medium |
| Worn sealant around chimney/vents | Yes | Low, DIY-friendly |
| Sun damage (granule loss, warping) | Partial | Medium |
| Ice dam damage | Yes (prevention key) | Medium to High |
| Sagging roof deck | Depends | High, Pro required |
| Widespread structural damage | Often replacement | High, Pro required |
If a repair would cost more than 50% of a full roof replacement, or if your roof is over 20 years old with widespread damage, replacement is the smarter long-term investment. A good roofer will give you an honest comparison of both options.
Roof Repair Costs: What to Expect
Cost is one of the first things homeowners want to know, and the answer depends on the roofing material, type of damage, and your location. Here is a realistic breakdown:
Cost by Roofing Material
| Roof Type | Repair Cost (per sq ft) | Avg Repair Job | Lifespan After Good Repair |
|---|---|---|---|
| Asphalt Shingles | $3.50 – $9.50 | $150 – $1,500 | 5 – 10 years |
| Flat Roof (built-up) | $4 – $10 | $300 – $2,500 | 3 – 7 years |
| TPO Roofing | $6 – $9 | $400 – $2,000 | 5 – 10 years |
| Rubber / EPDM | $5 – $8 | $300 – $1,800 | 5 – 12 years |
| Metal Roofing | $8 – $12 | $500 – $3,000 | 10 – 20 years |
| Clay or Concrete Tile | $10 – $20 | $300 – $1,500 per section | Decades if isolated |
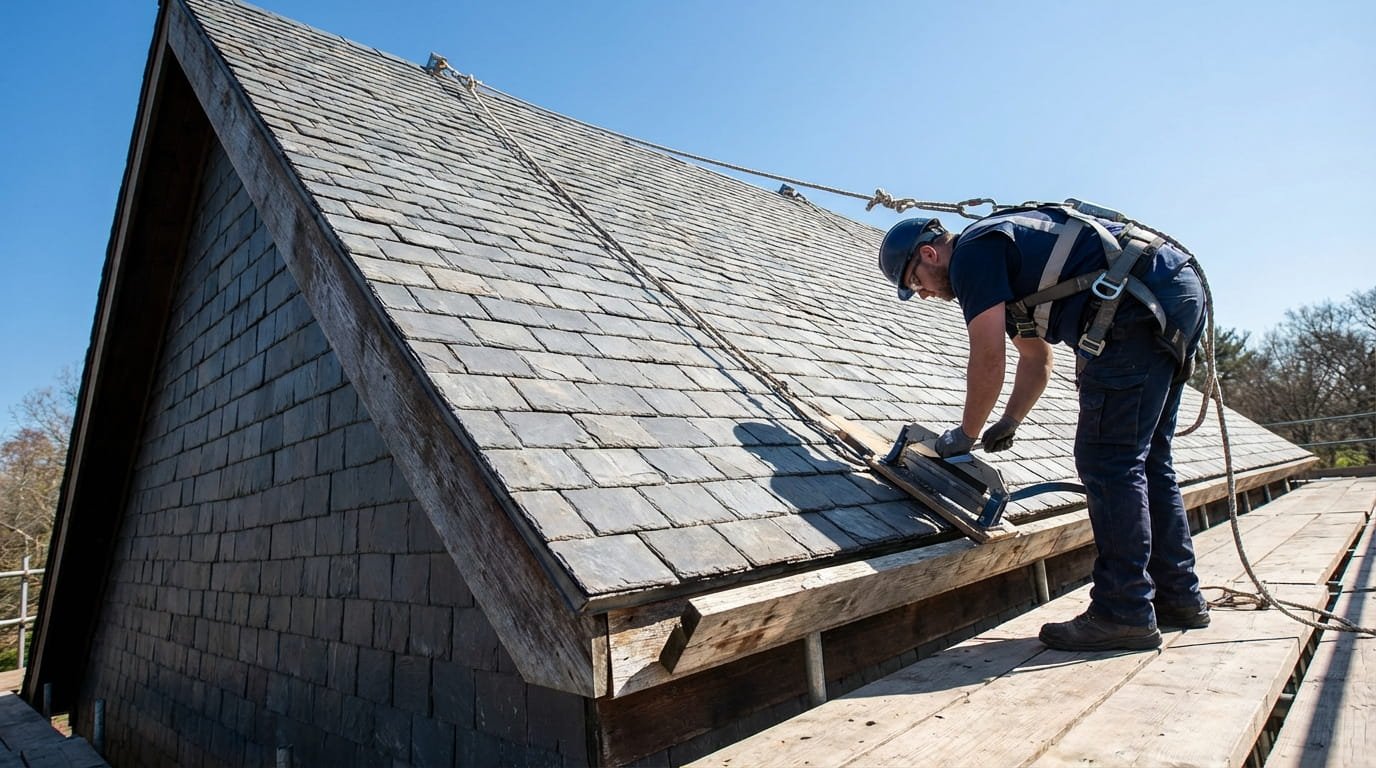
| Slate | $15 – $30 | $500 – $2,500 | Decades if isolated |
Cost by Type of Damage
- Replacing a few shingles: $150 – $400
- Patching a small leak: $200 – $600
- Repairing or replacing flashing: $200 – $500
- Repairing a sagging section: $1,000 – $3,500
- Extensive water damage with deck repair: $2,500 – $6,000+
- Full roof replacement (asphalt, average home): $8,000 – $20,000
Factors That Affect Your Final Bill
- Roof pitch (steep roofs = higher labor costs)
- Accessibility (tight spaces, multi-story homes)
- Your local labor market, city rates are higher than rural
- Emergency or after-hours repairs (expect a 25–50% premium)
- Season, peak season (spring/summer) often costs more
Always get at least three written quotes from licensed contractors before committing. Homeowners who compare quotes typically save 15–30% on labor costs, often hundreds of dollars on a single repair.
Repair Techniques by Roof Type
The right repair method depends entirely on what type of roof you have. Here is a practical guide to each:
The most common roof type in North America. Shingles can crack, curl, or go missing due to age, storms, or poor installation.
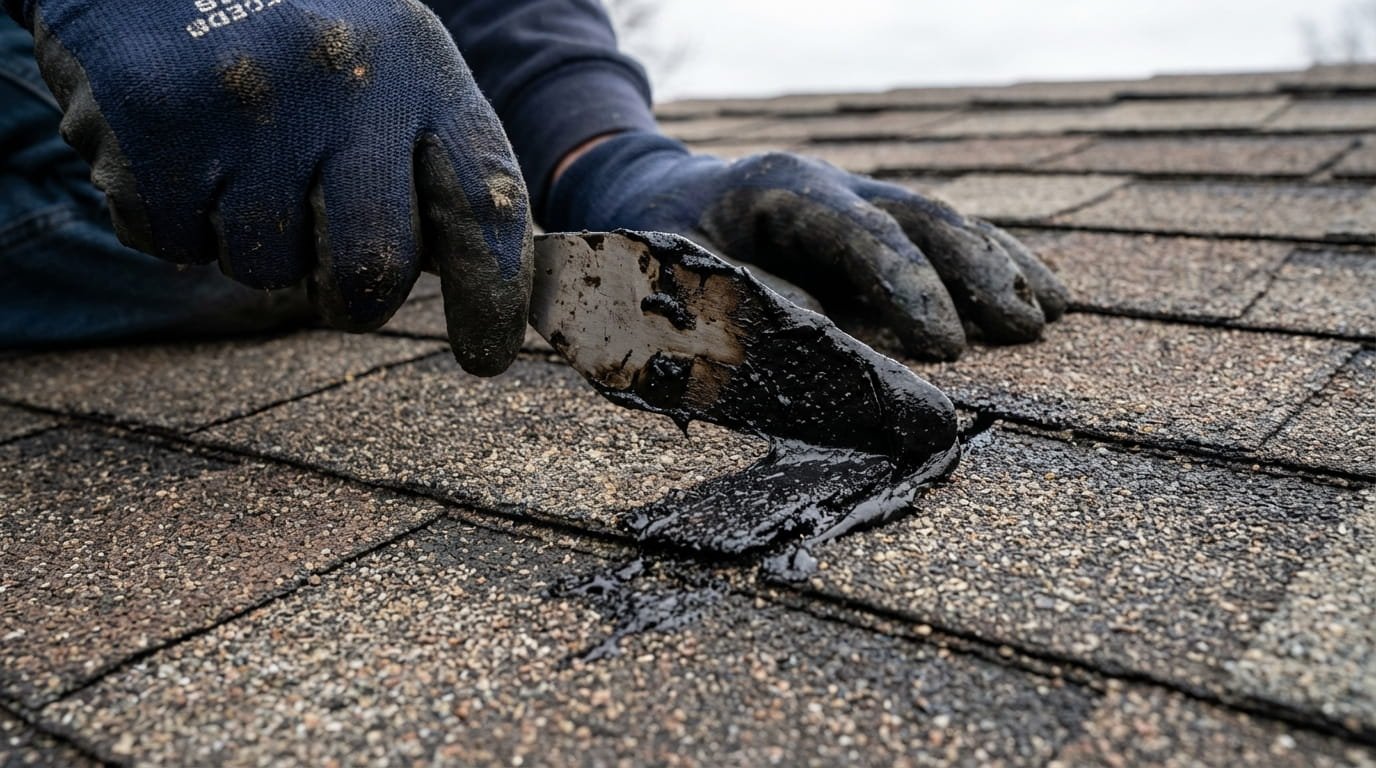
- Curling shingles: apply roofing cement underneath and press flat; hold with a weight overnight
- Cracked shingles: inject roofing cement into the crack, press together, seal edges with cement
- Missing shingles: remove nails from surrounding shingles, slide new shingle in, nail it down, seal with roofing cement
Flat roofs are prone to ponding water and blisters. Small cracks and holes can be DIY-patched; persistent ponding usually needs a professional drainage solution.
- Small holes or cracks: clean the area thoroughly, apply roofing cement, press a matching material patch on top, seal edges
- Blisters: cut an X to release trapped moisture, let dry, apply cement underneath, reseal and patch
- Ponding water: clear drainage blockages; if the issue persists, call a professional to assess slope
Metal roofs are low-maintenance but not invincible. They can develop loose seams, rusty spots, and small holes over time.
- Loose seams: apply metal-specific roofing sealant and reseal with appropriate screws
- Rust spots: sand the area, treat with rust-converting primer, apply sealant or touch-up paint
- Small holes: cut a patch from the same metal type, seal with metal roofing adhesive and screws
EPDM rubber roofs are among the easiest to repair. The membrane is flexible and adhesive patches bond well.
- Locate the leak, clean and dry the area thoroughly
- Apply EPDM primer, then rubber adhesive or lap sealant
- Press a rubber patch firmly over the damaged area; embed fleece in the adhesive for extra strength
TPO repairs require heat-welding equipment or TPO-specific adhesive. For anything beyond a small patch, professional help is recommended.
- Small tears: clean the area, apply a TPO-compatible adhesive patch, press firmly
- Larger damage: a new patch section must extend 6 inches beyond all edges; heat-weld or adhesive-bond
- Always follow manufacturer guidelines, improper repairs can void the warranty
DIY Roof Repair: Tools, Safety and Step-by-Step Guide
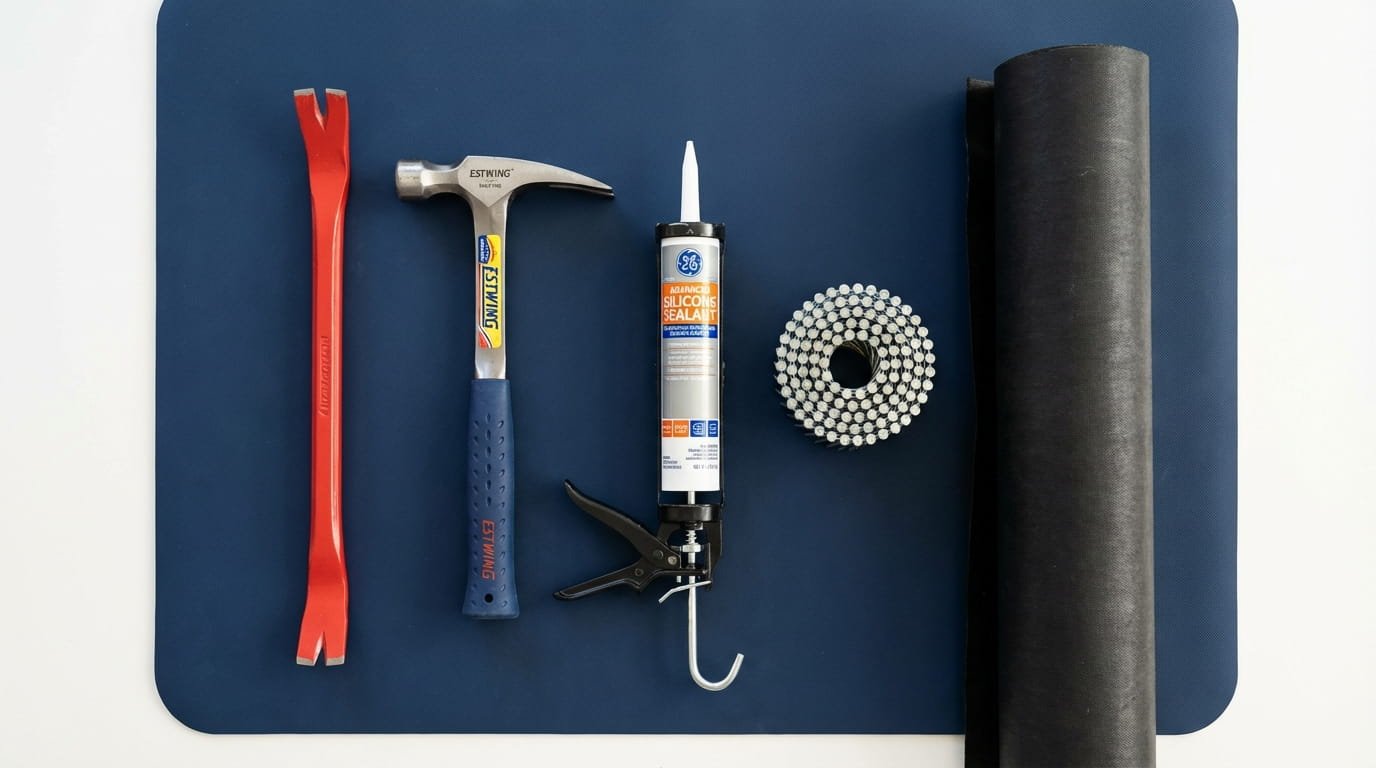
Essential Tools and Materials Checklist
| Tool / Material | Purpose |
|---|---|
| Roofing nail gun or hammer | Fasten shingles and nails securely |
| Pry bar | Lift and remove damaged shingles without tearing surrounding ones |
| Utility knife | Cut shingles, underlayment, and flashing to size |
| Measuring tape | Accurate measurements prevent wasteful mistakes |
| Caulk gun and roofing cement | Seal gaps around vents, flashing, and repaired areas |
| Replacement shingles | Match existing style, color, and material |
| Roofing underlayment | Extra moisture barrier layer beneath shingles |
| Flashing (metal strips) | Seal joints around chimneys, skylights, and vents |
| Galvanized roofing nails | Corrosion-resistant fasteners appropriate for the material |
| Safety harness and non-slip shoes | Essential fall protection for any roof work |
| Sturdy ladder | Access tool, must be rated for your weight and gear |
Safety Rules Before You Start
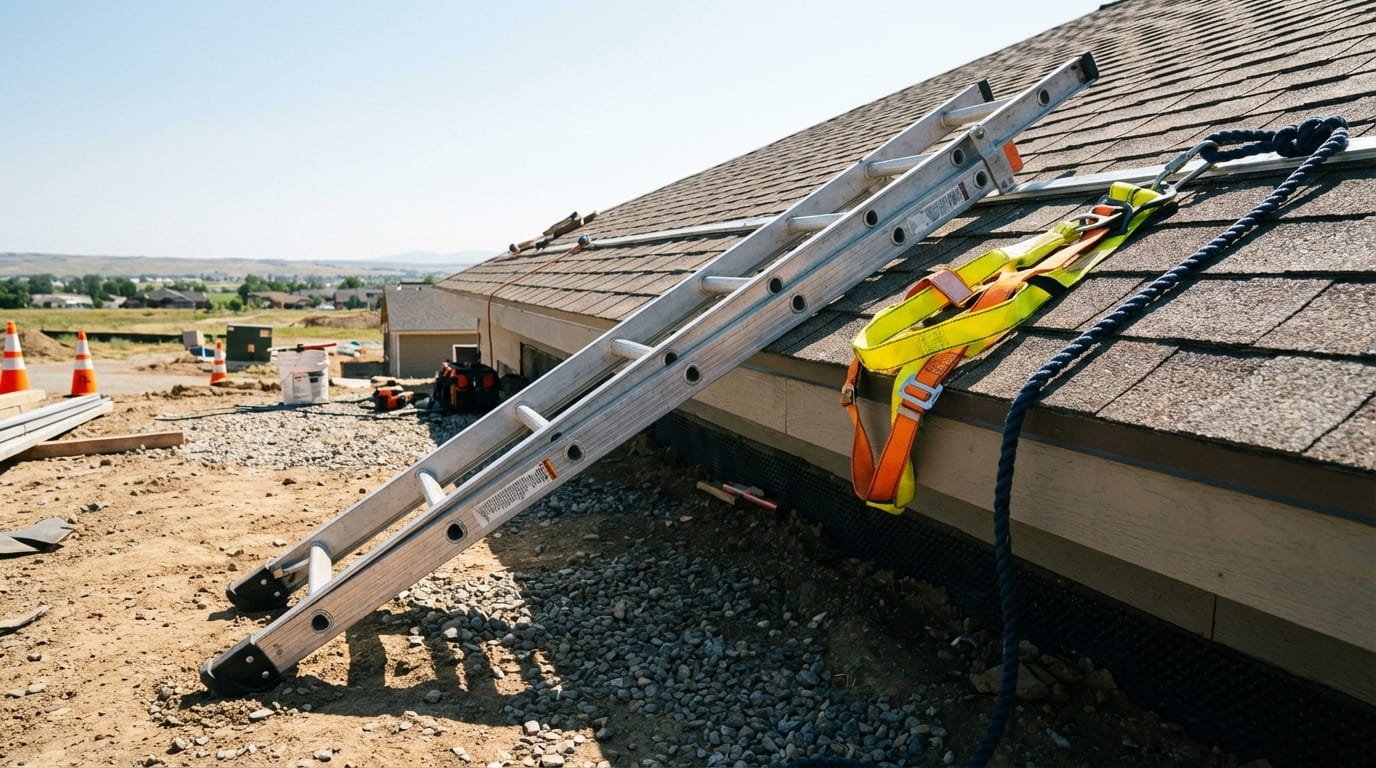
- Only work on a dry roof, wet shingles are dangerously slippery
- Always use a safety harness on pitches steeper than 4:12
- Use a ladder with rubber feet on stable, level ground
- Wear non-slip footwear, rubber soles only
- Never work alone, have someone on the ground for emergencies
- Stay off the roof during high winds or in extreme heat
- Keep tools in a pouch or bucket, never leave them loose on the roof
Step-by-Step: How to Replace a Damaged Shingle

- Inspect the area and identify all damaged or loose shingles
- Carefully lift the edges of surrounding shingles using a pry bar
- Remove the nails holding the damaged shingle, usually four nails per shingle
- Slide the old shingle out and dispose of it
- Slide the new shingle into place, aligning it with the surrounding row
- Drive four roofing nails just below the adhesive strip
- Apply a small dab of roofing cement under the overlapping shingles and press them down
- Check that the edges are sealed and no gaps remain
Step-by-Step: How to Patch a Roof Leak
- From the attic, identify the approximate location of the leak (look for wet insulation or water stains)
- On the roof, trace back from the visible wet spot. Leaks often travel several feet before dripping.
- Mark the source area with chalk
- Clean the damaged area of all debris and loose material
- Let it dry completely, never patch a wet surface
- Apply roofing cement generously with a trowel, extending 3–4 inches beyond the damage
- Cut a matching patch from roofing material and press it firmly into the cement
- Apply a second coat of cement over the patch edges to create a waterproof seal
- After the repair, check the attic during the next rainfall to confirm the leak is sealed
Step-by-Step: How to Fix Damaged Flashing
- Inspect flashing around chimneys, skylights, pipes, and valley seams for cracks, gaps, or separation
- If only the sealant has failed: remove old caulk, clean the surface, apply new silicone roofing caulk
- If flashing is bent or separated: use a pry bar to lift it gently, apply new roofing cement underneath, press it back into position
- If flashing is corroded or cracked: replace the entire section, cut new flashing to size, slide it under the shingles, secure with screws, seal all edges
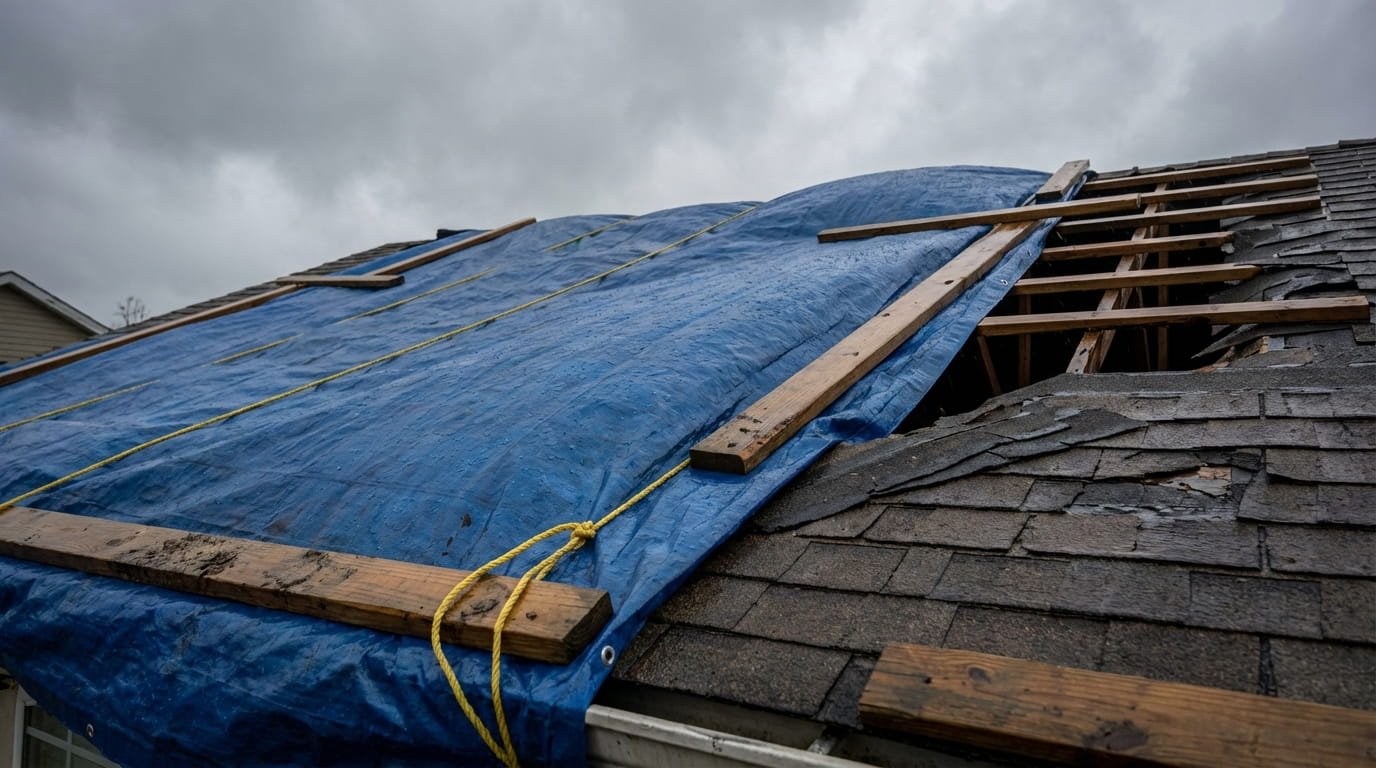
If you discover significant damage during a storm or when repairs cannot happen immediately, cover the affected area with a heavy-duty polyethylene tarp. Secure it with wooden boards and rope, not just bungee cords. This buys you time without risking interior water damage. For urgent situations, our emergency roofing team is available 24/7.
DIY vs. Professional Roof Repair: How to Decide
Not every roof problem belongs on a weekend to-do list. Here is a clear breakdown:
| Repair Task | DIY-Friendly? | Pro Recommended? | Why |
|---|---|---|---|
| Replacing 1–5 shingles | Yes | Optional | Simple, low-risk task |
| Minor caulking around vents | Yes | No | Basic sealant work |
| Patching a small isolated leak | Maybe | If it recurs | Needs correct diagnosis |
| Fixing flashing | With experience | Yes | Easy to do incorrectly |
| Repairing a sagging section | No | Yes | Structural risk |
| Large-scale water damage | No | Yes | May involve deck replacement |
| Recurring or spreading leaks | No | Yes | Root cause is usually hidden |
| Any work near electrical fixtures | No | Yes | Safety hazard |
When You Must Call a Professional
- The roof is sagging or shows signs of structural compromise
- You have had the same leak repaired more than once and it keeps returning
- Water damage is visible in the attic insulation or wooden framing
- The damaged area is larger than 100 square feet
- You are not comfortable working at heights. No repair is worth a fall.
How to Choose a Qualified Roofing Contractor
- Verify they are licensed in your state and carry both liability insurance and workers’ compensation
- Ask for at least two or three references from recent local jobs and actually call them
- Get a detailed written estimate, materials, labor, timeline, and cleanup should all be itemized
- Confirm they offer a workmanship warranty (typically 2–10 years) in addition to manufacturer material warranties
- Check Google, BBB, and Yelp reviews, look for patterns, not just star ratings
Be cautious of contractors who arrive unsolicited after a storm (“storm chasers”), demand large cash payments upfront, cannot provide proof of insurance, offer only a verbal estimate, or pressure you to sign on the spot. Legitimate contractors are never in a rush for your signature.
How Long Do Roof Repairs Last?
A high-quality repair done with the right materials can last for many years, sometimes decades. Here is what to realistically expect from each roofing material:
| Roof Material | Material Lifespan | Good Repair Lifespan | Key Durability Factor |
|---|---|---|---|
| Asphalt Shingles | 15 – 30 years | 5 – 15 years | Ventilation quality |
| Metal Roofing | 40 – 70 years | 15 – 25 years | Fastener integrity |
| EPDM Rubber | 20 – 40 years | 10 – 15 years | UV exposure |
| TPO | 15 – 25 years | 8 – 12 years | Seam quality |
| Clay / Concrete Tile | 50 – 100 years | Decades (individual tiles) | Impact damage |
| Slate | 75 – 150 years | Decades (individual slates) | Flashing quality |
| Flat / Built-Up | 15 – 30 years | 3 – 7 years | Drainage design |
Factors That Affect Repair Durability
- Material quality: cheap materials fail faster, always choose manufacturer-recommended products
- Installation precision: even the right materials will fail if improperly installed
- Attic ventilation: poor ventilation traps heat and moisture, dramatically accelerating shingle degradation
- Climate: roofs in areas with frequent freeze-thaw cycles, high winds, or intense UV exposure wear faster
- Maintenance frequency: roofs that are inspected and minor issues addressed early last significantly longer
How Weather and Environment Impact Roof Repair
Storm and Wind Damage
High winds, hail, and heavy rainfall are the leading causes of roof damage. After any significant storm, inspect your roof as soon as it is safe to do so.
- Check for lifted, missing, or dented shingles. Even small gaps allow water infiltration.
- Inspect all flashing points, storm force can pull flashing away from walls and chimneys
- Look in gutters for granule accumulation, which indicates shingle impact damage
- Check the attic immediately after a storm for fresh water stains or active dripping
Sun and Heat Damage
Prolonged UV exposure breaks down roofing materials over time, regardless of storm activity:
- Asphalt shingles become brittle, crack, and lose granules under constant sun
- Rubber and TPO membranes can develop micro-cracks from thermal expansion and contraction
- Sealants around flashing and vents dry out and crack in high heat, creating leak points
Light-colored or reflective roofing materials can significantly reduce heat absorption and slow this degradation.
Ice Dams and Freeze-Thaw Cycles
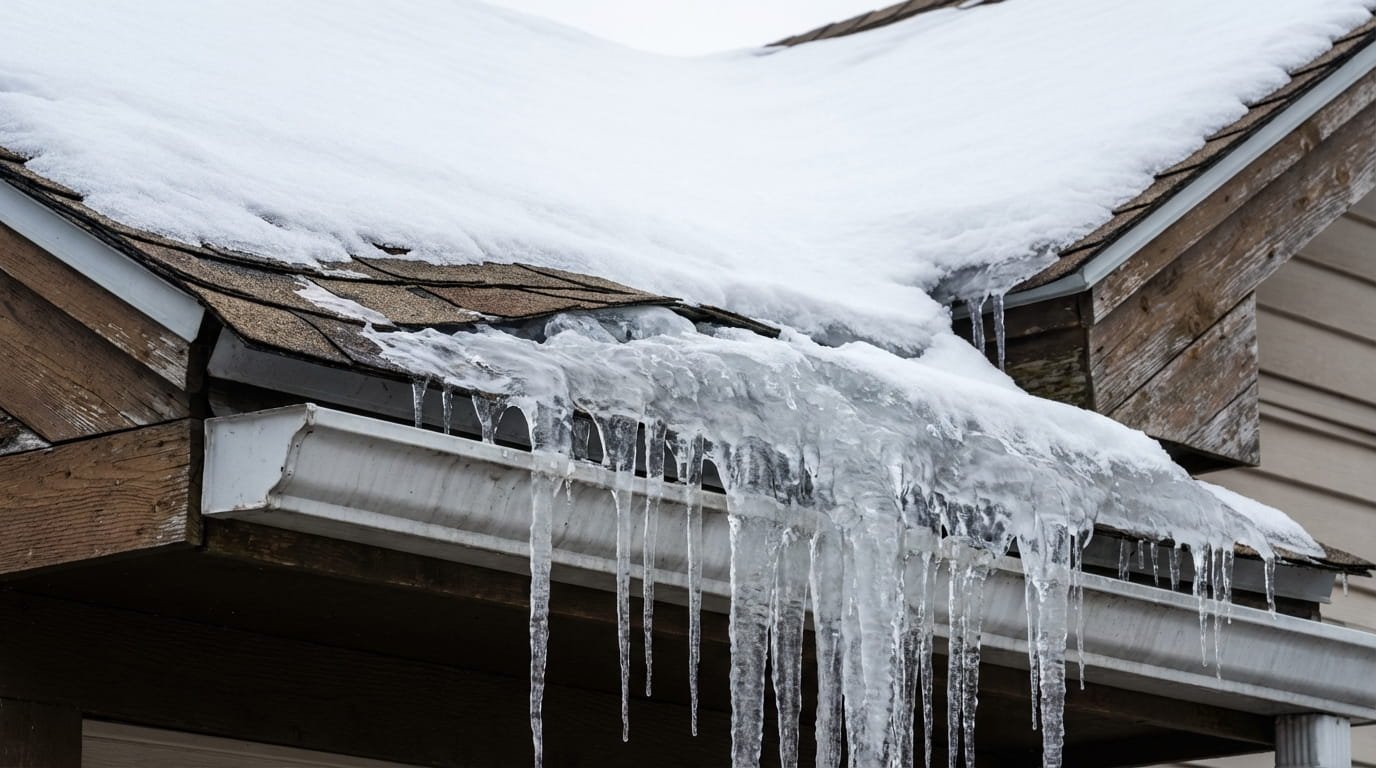
Common in colder climates, ice dams form when heat escaping from the attic melts roof snow, which then refreezes at the cold eaves. This creates a dam that forces meltwater under shingles.
- Prevention: improve attic insulation and ventilation to keep the roof deck consistently cold
- If an ice dam forms: never use a hammer or sharp tool to remove it, you will damage the shingles
- Safe removal: use a calcium chloride de-icer sock or hire a professional with a steam system
- After the dam melts: inspect for lifted shingles and water stains in the attic
Moss, Algae, and Biological Growth
Moss holds moisture against shingles and accelerates decay. Algae causes black streaks and can damage shingle granules over time. See our guide on black streaks on roof shingles for a full treatment walkthrough.
- Prevention: trim overhanging branches, ensure proper drainage, and consider zinc or copper strips at the ridge
- Treatment: apply a diluted bleach-water solution or a commercial roof cleaner; never use a pressure washer
- If moss is thick: hand-removal followed by a treatment product is needed before it regrows
Smart Maintenance Habits to Extend Your Roof’s Life
The single most cost-effective thing you can do for your roof is to maintain it regularly. A $200-per-year roof maintenance routine can prevent a $5,000 emergency repair.
Seasonal Inspection Checklist
| Season | Key Inspection Tasks |
|---|---|
| Spring | Check for winter damage, clean gutters of debris, inspect flashing after freeze-thaw |
| Summer | Trim overhanging branches, check for UV cracking on sealants and shingles |
| Fall | Clear all leaves from roof and gutters before winter rains, check for loose shingles |
| Winter | Monitor for ice dam formation, inspect attic for signs of condensation or water entry |
| After any storm | Full visual inspection, focus on shingles, flashing, and gutters |
Gutter Maintenance and Drainage
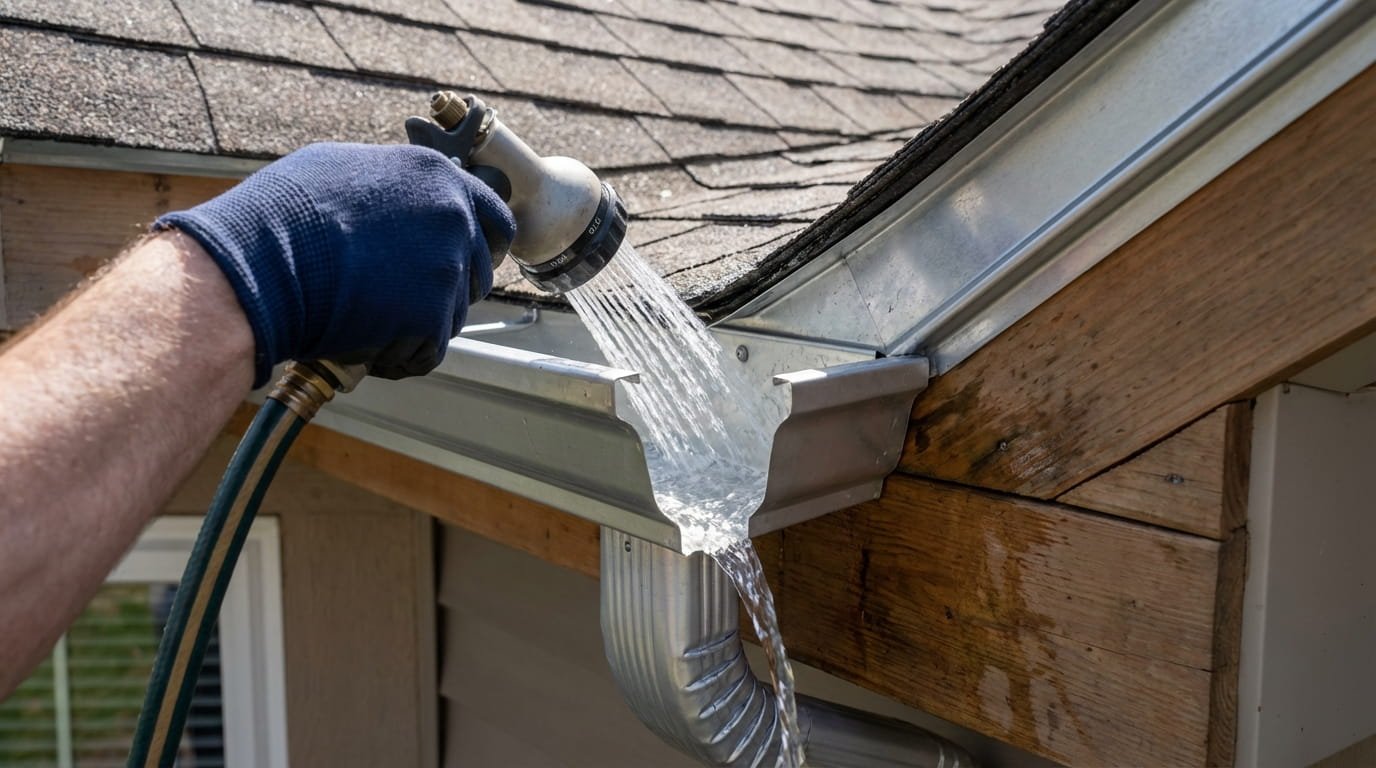
Gutters are your roof’s drainage system. A blocked gutter sends water under shingles, into fascia, and down your foundation walls. See our seamless gutters page for upgrade options.
- Clean gutters at minimum twice a year, spring and fall
- Check that downspouts direct water at least 3 feet away from the foundation
- Install gutter guards if leaf buildup is a recurring problem
- After cleaning, run a hose through to confirm water flows freely and there are no leaks at seams
Tree Trimming and Debris Removal
- Keep all branches at least 6 feet from the roof surface to prevent abrasion
- Remove leaves and organic debris promptly, they trap moisture and encourage moss
- Watch for nesting animals, squirrels and birds can lift shingles and damage vents
Ventilation and Insulation: The Hidden Key to Roof Longevity
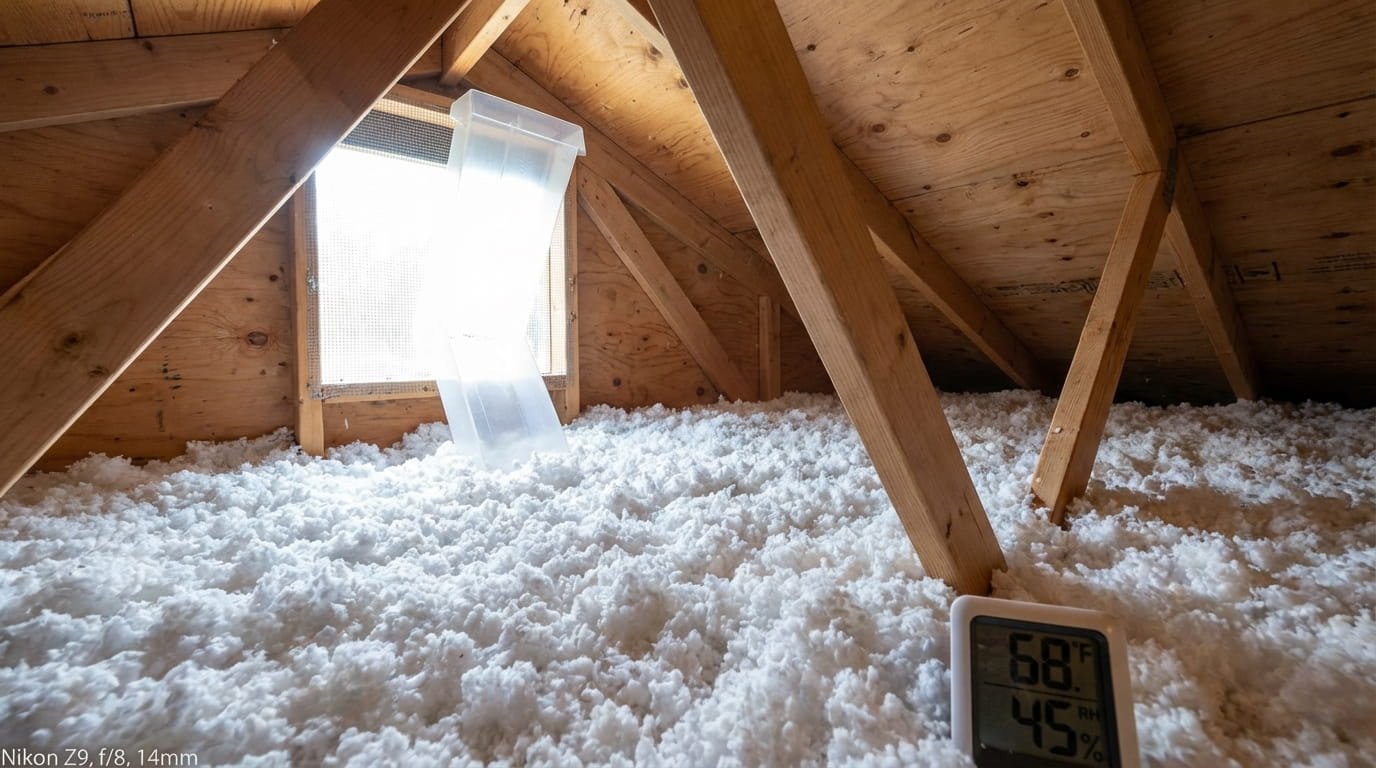
Here is something most homeowners do not know: poor attic ventilation is one of the leading causes of premature shingle failure. When attic heat has nowhere to go, it bakes shingles from below while outdoor heat bakes them from above. The result is accelerated cracking, granule loss, and early failure.
Proper ventilation, through ridge vents, soffit vents, or gable vents, maintains a consistent attic temperature. Proper insulation prevents warm indoor air from rising into the attic and causing condensation and ice dams. Together, they can add 5–10 years to your roof’s functional life.
Permits and Regulations for Roof Repair
Most homeowners are surprised to learn that some roof repairs require a permit. Getting this wrong can create problems when selling your home or filing an insurance claim.
- Replacing more than a certain percentage of the total roof area (often 25%+)
- Structural changes such as adding dormers or changing the roof’s pitch
- Changing the roofing material type (e.g., replacing asphalt with metal)
- Installing new skylights or significantly altering penetrations
- Replacing a few damaged shingles like-for-like
- Re-sealing or replacing flashing in a small area
- Patching a membrane on a flat roof
- Routine maintenance and gutter repairs
Building codes and permit requirements vary significantly between cities, counties, and states. Before starting any significant repair, spend 10 minutes calling your local building authority or checking their website. Unpermitted work on a major repair can complicate insurance claims and home sales.
Does Homeowners Insurance Cover Roof Repairs?
This is one of the most common questions homeowners ask, and the answer is: it depends on the cause of the damage.
- Storm damage: wind, hail, lightning, and heavy snow/ice
- Fire damage
- Falling objects such as trees or branches
- Vandalism
- Normal wear and tear or aging of the roof
- Damage from neglect or lack of maintenance
- Pre-existing damage present before the policy began
- Gradual damage such as slow leaks ignored over time
- Mold, rot, or infestations from poor maintenance
How to File a Successful Roof Repair Claim
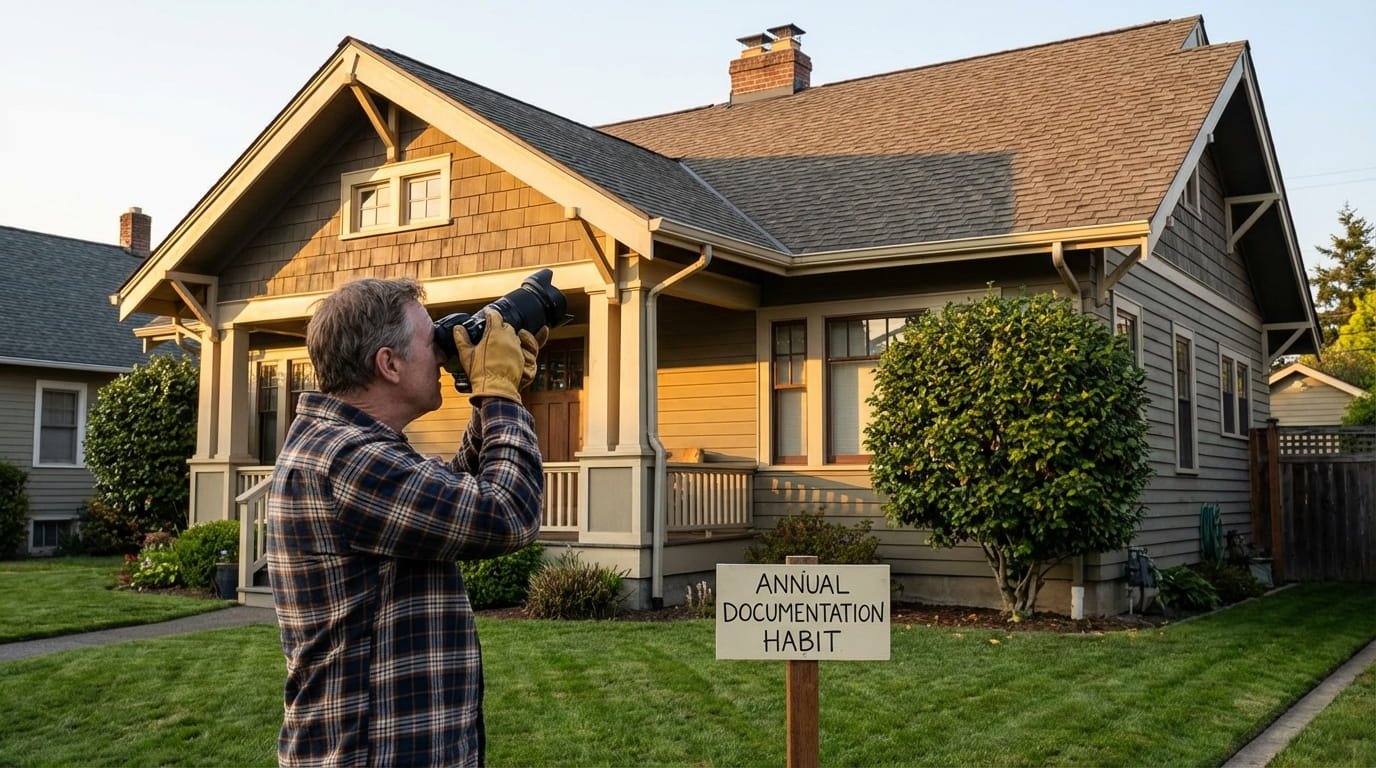
- Document the damage immediately with dated photos and videos
- Contact your insurance company to report the damage and request a claim number
- Get two or three estimates from licensed contractors before the adjuster visits
- Have a contractor present during the insurance adjuster’s inspection, they can advocate for you
- Review the settlement offer carefully and ask for an itemized breakdown
- Do not begin permanent repairs until your claim is approved
Take dated photos of your roof every fall before winter arrives. If damage occurs and you file a claim, these photos prove the pre-damage condition of your roof. This baseline is invaluable when disputing a claim or proving sudden-event damage versus pre-existing wear.
Frequently Asked Questions About Roof Repair
Can I repair my roof myself?
Yes, for minor issues like replacing a few shingles, re-caulking a vent, or patching a small leak. However, complex repairs involving structural components, widespread damage, or steep pitches should be handled by a licensed professional. If you are unsure, the cost of a professional inspection ($100–$300) is far cheaper than a repair gone wrong.
How long does a roof repair take?
Simple repairs like replacing a few shingles take 1–3 hours. Moderate repairs such as patching multiple leak areas or replacing a section of flashing can take a full day. Large-scale structural or water damage repairs may take 2–5 days depending on scope, crew size, and weather conditions.
How do I know if I need a repair or a full replacement?
If your roof is under 15 years old and the damage is isolated, a repair is almost always the right call. If it is over 20 years old, has widespread damage, or if repair costs exceed 50% of replacement costs, a full replacement will likely serve you better in the long run. A professional assessment will give you a clear comparison.
How often should I inspect my roof?
At minimum, twice a year, once in spring and once in fall. Also inspect after any significant storm. A professional roof inspection is recommended every 3–5 years even if no visible problems exist. Regular inspections catch small problems before they become expensive ones.
What are the most common causes of roof damage?
The top causes are severe weather (wind, hail, heavy rain, snow), physical impact from falling branches, improper installation, and gradual age-related wear. Blocked gutters are also a surprisingly common cause of water damage that homeowners often overlook.
Will my homeowners insurance cover roof repairs?
Sudden damage from storms, fire, or falling objects is typically covered. Damage from neglect, normal wear, or pre-existing conditions is not. Always document damage promptly and check your specific policy terms. Coverage conditions vary significantly between providers.
How much does roof repair cost?
Costs range from $150 for a simple shingle replacement to $6,000+ for significant structural water damage. The material type, damage extent, roof pitch, and your location all influence the final price. See the cost breakdown table earlier in this article for material-specific estimates.
Final Thoughts
A well-maintained roof is not just about keeping the rain out. It is about protecting your home’s structure, your family’s comfort, and the value of your investment. The homeowners who spend the least on roofing over time are not the ones who avoid spending money; they are the ones who catch problems early, maintain gutters, ensure proper ventilation, and call a professional before a minor issue becomes a major one.
Use the inspection checklists in this guide every season. Address small repairs promptly. Know when to pick up the tools yourself and when to pick up the phone instead. For ongoing protection, explore our roof maintenance plans and residential roofing services. Your roof, and your wallet, will thank you.
Not sure whether you are looking at a repair or a replacement situation? A professional roof inspection typically costs $100–$300 and can save you thousands by giving you an accurate diagnosis before you spend money in the wrong direction. Contact us today to schedule yours.